




What Is the HTTP Authentication feature?
HTTP Authentication (also called “Basic Auth” or “htpasswd”) is a browser-level authentication mechanism. Before any content is served, the browser shows a username/password prompt. The user must enter valid credentials to access any page, including the wp-admin.
This is different from the WordPress login. WordPress login only protects wp-admin (and some other paths). HTTP Authentication protects the entire site, including the frontend.
Why You Need It
HTTP Authentication is the strongest form of web authentication because:
- Browser-level: The authentication happens before any PHP code runs
- Universal: Affects all visitors, not just WordPress users
- No bypass: Even if WordPress has a vulnerability, the attacker can’t reach it without the HTTP auth
- Server-level: The credentials are stored in .htaccess (Apache) or server config (Nginx)
For sites that need maximum security, HTTP Authentication is the gold standard.
Trade-offs vs WordPress login
HTTP Authentication has trade-offs:
- No logout button: Users must close their browser to log out (or use private/incognito mode)
- No remember me: Each browser session requires re-authentication
- No user roles: HTTP Auth doesn’t know about WordPress roles (any valid HTTP auth user can access the site)
- Less user-friendly: The browser prompt is more intimidating than the WordPress login form
For most public-facing sites, WordPress login is sufficient. For staging, internal tools, and other private sites, HTTP Authentication is the right choice.
How to Enable HTTP Authentication in WordPress
Step 1: Set the Credentials
Before enabling, decide on the username and password. Use a strong password (16+ characters, generated).
Step 2: Navigate to Settings
Click into the Classic Monks plugin settings in your WordPress dashboard.
Step 3: Go to the Security Tab
Click on the Security menu, then click the Staging Protection subtab.
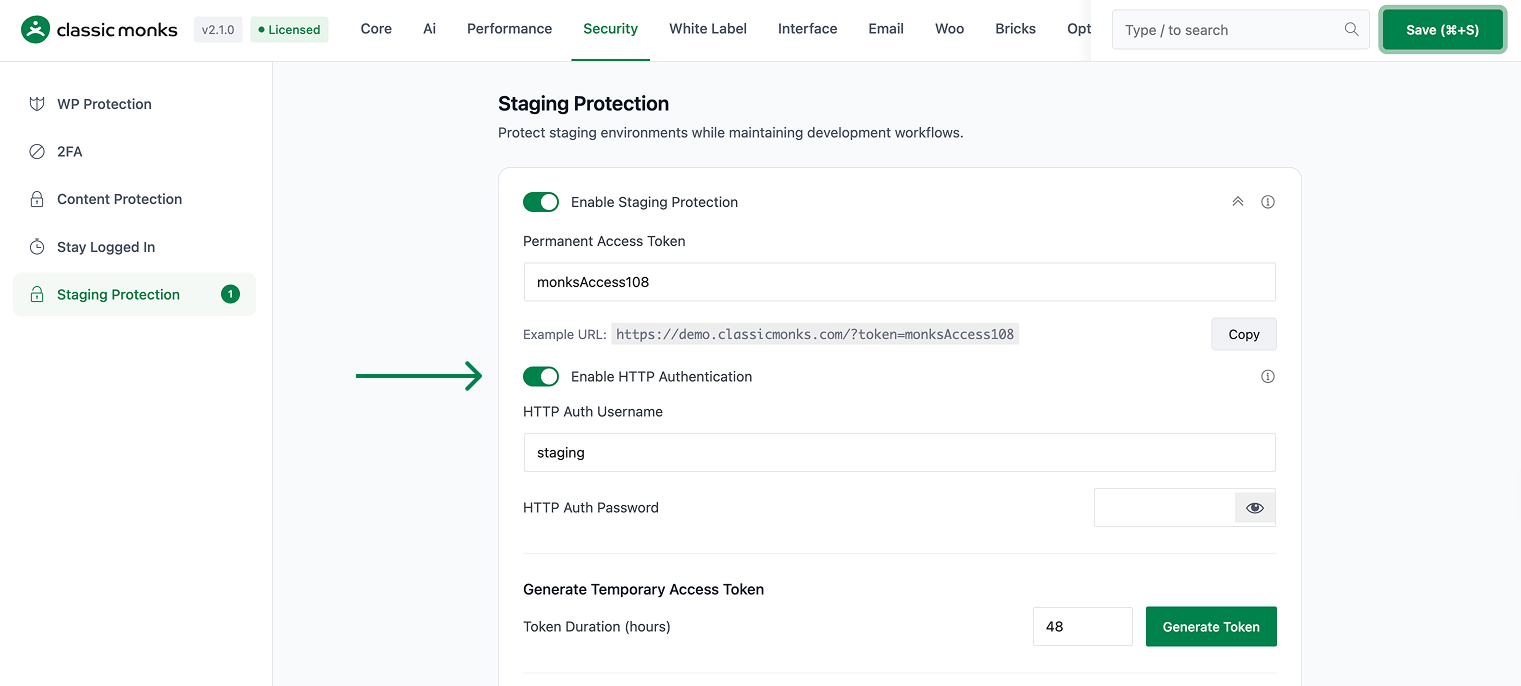
Step 4: Enable HTTP Authentication
Scroll to Enable HTTP Authentication and toggle on. The credentials are configured via filter (see Advanced Options) or in the .htaccess file (default).
Step 5: Save Changes
Click Save Changes.
Step 6: Test
Visit the site in a new browser (or private/incognito mode). The browser should show a username/password prompt. Enter the correct credentials to access the site.
Configuration Options
| Option | Description | Default |
|---|---|---|
| Enable HTTP Authentication | Master toggle. | Off |
The credentials are configured in the .htaccess file (Apache) or in the plugin settings under Security > Staging Protection.
What Gets Affected
- All visitors: must enter the HTTP auth username/password
- The frontend: protected by HTTP auth
- The admin: protected by HTTP auth (in addition to WordPress login)
- The API: protected by HTTP auth
What Does NOT Get Affected
- The server performance: HTTP auth is fast
- The WordPress functionality: works the same after authentication
- The database: not affected
- The user accounts: HTTP auth is separate from WordPress users

Add your first comment to this post