




What Image Converter Does
Image Converter processes WordPress image attachments and creates WebP or AVIF output files. It updates the attachment’s file path, MIME type, metadata, GUID, and generated size references when conversion succeeds.
The converter can also process new uploads automatically. It preserves original files by default, which gives you a rollback path if the output is not suitable. If you disable original preservation, the source file may be deleted after a successful conversion and cannot be restored by the converter.
The feature is not a generic image editor. It does not expose arbitrary JPEG-to-PNG or PNG-to-JPEG output selection. The output target is selected between WebP and AVIF.
Before You Convert Anything
Confirm server support
The converter requires at least one server image-processing library:
- Imagick
- GD
AVIF additionally requires AVIF support in the installed library. If AVIF is selected but the server does not support it, Classic Monks displays a warning and falls back to WebP or refuses the conversion path depending on the processing stage.
Back up the site
Preserved originals are useful, but they are not a replacement for a site backup. Back up the uploads directory and database before a large conversion run.
Start with a small test
Do not start with the whole Media Library. Test several representative files first:
- JPEG photograph
- Transparent PNG
- Large hero image
- Existing WebP or AVIF file
- Image with multiple generated sizes
Check the frontend, Media Library metadata, and image URLs before converting the full library.
Decide whether to preserve originals
Keep Preserve Original Files enabled until the converted output has been verified. Disabling it reduces disk usage but removes the safety net for rollback.
How to Enable and Run Image Converter
Step 1: Open the Image Converter
In WordPress admin, open Classic Monks > Performance and select the Media Enhancements subtab.
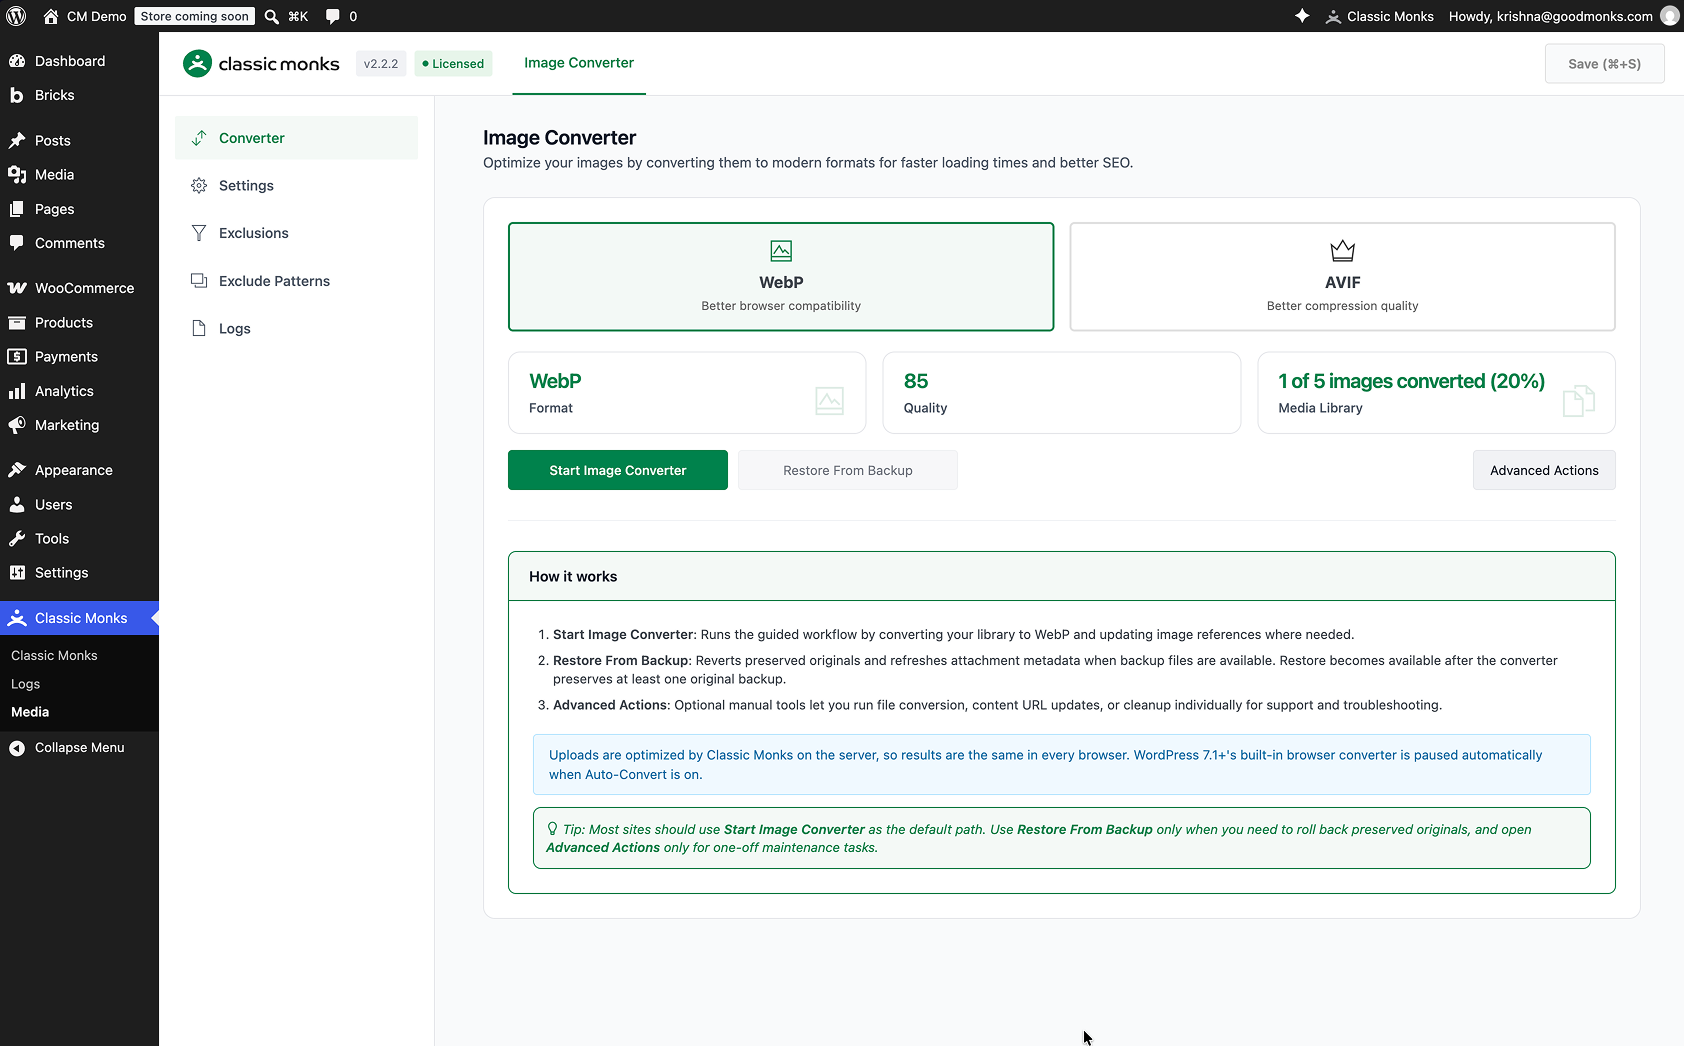
Enable Image Converter, then click Save Changes if the settings page indicates unsaved changes.
Step 2: Open the Converter subtab
The Image Converter page has five subtabs:
- Converter
- Settings
- Exclusions
- Exclude Patterns
- Logs
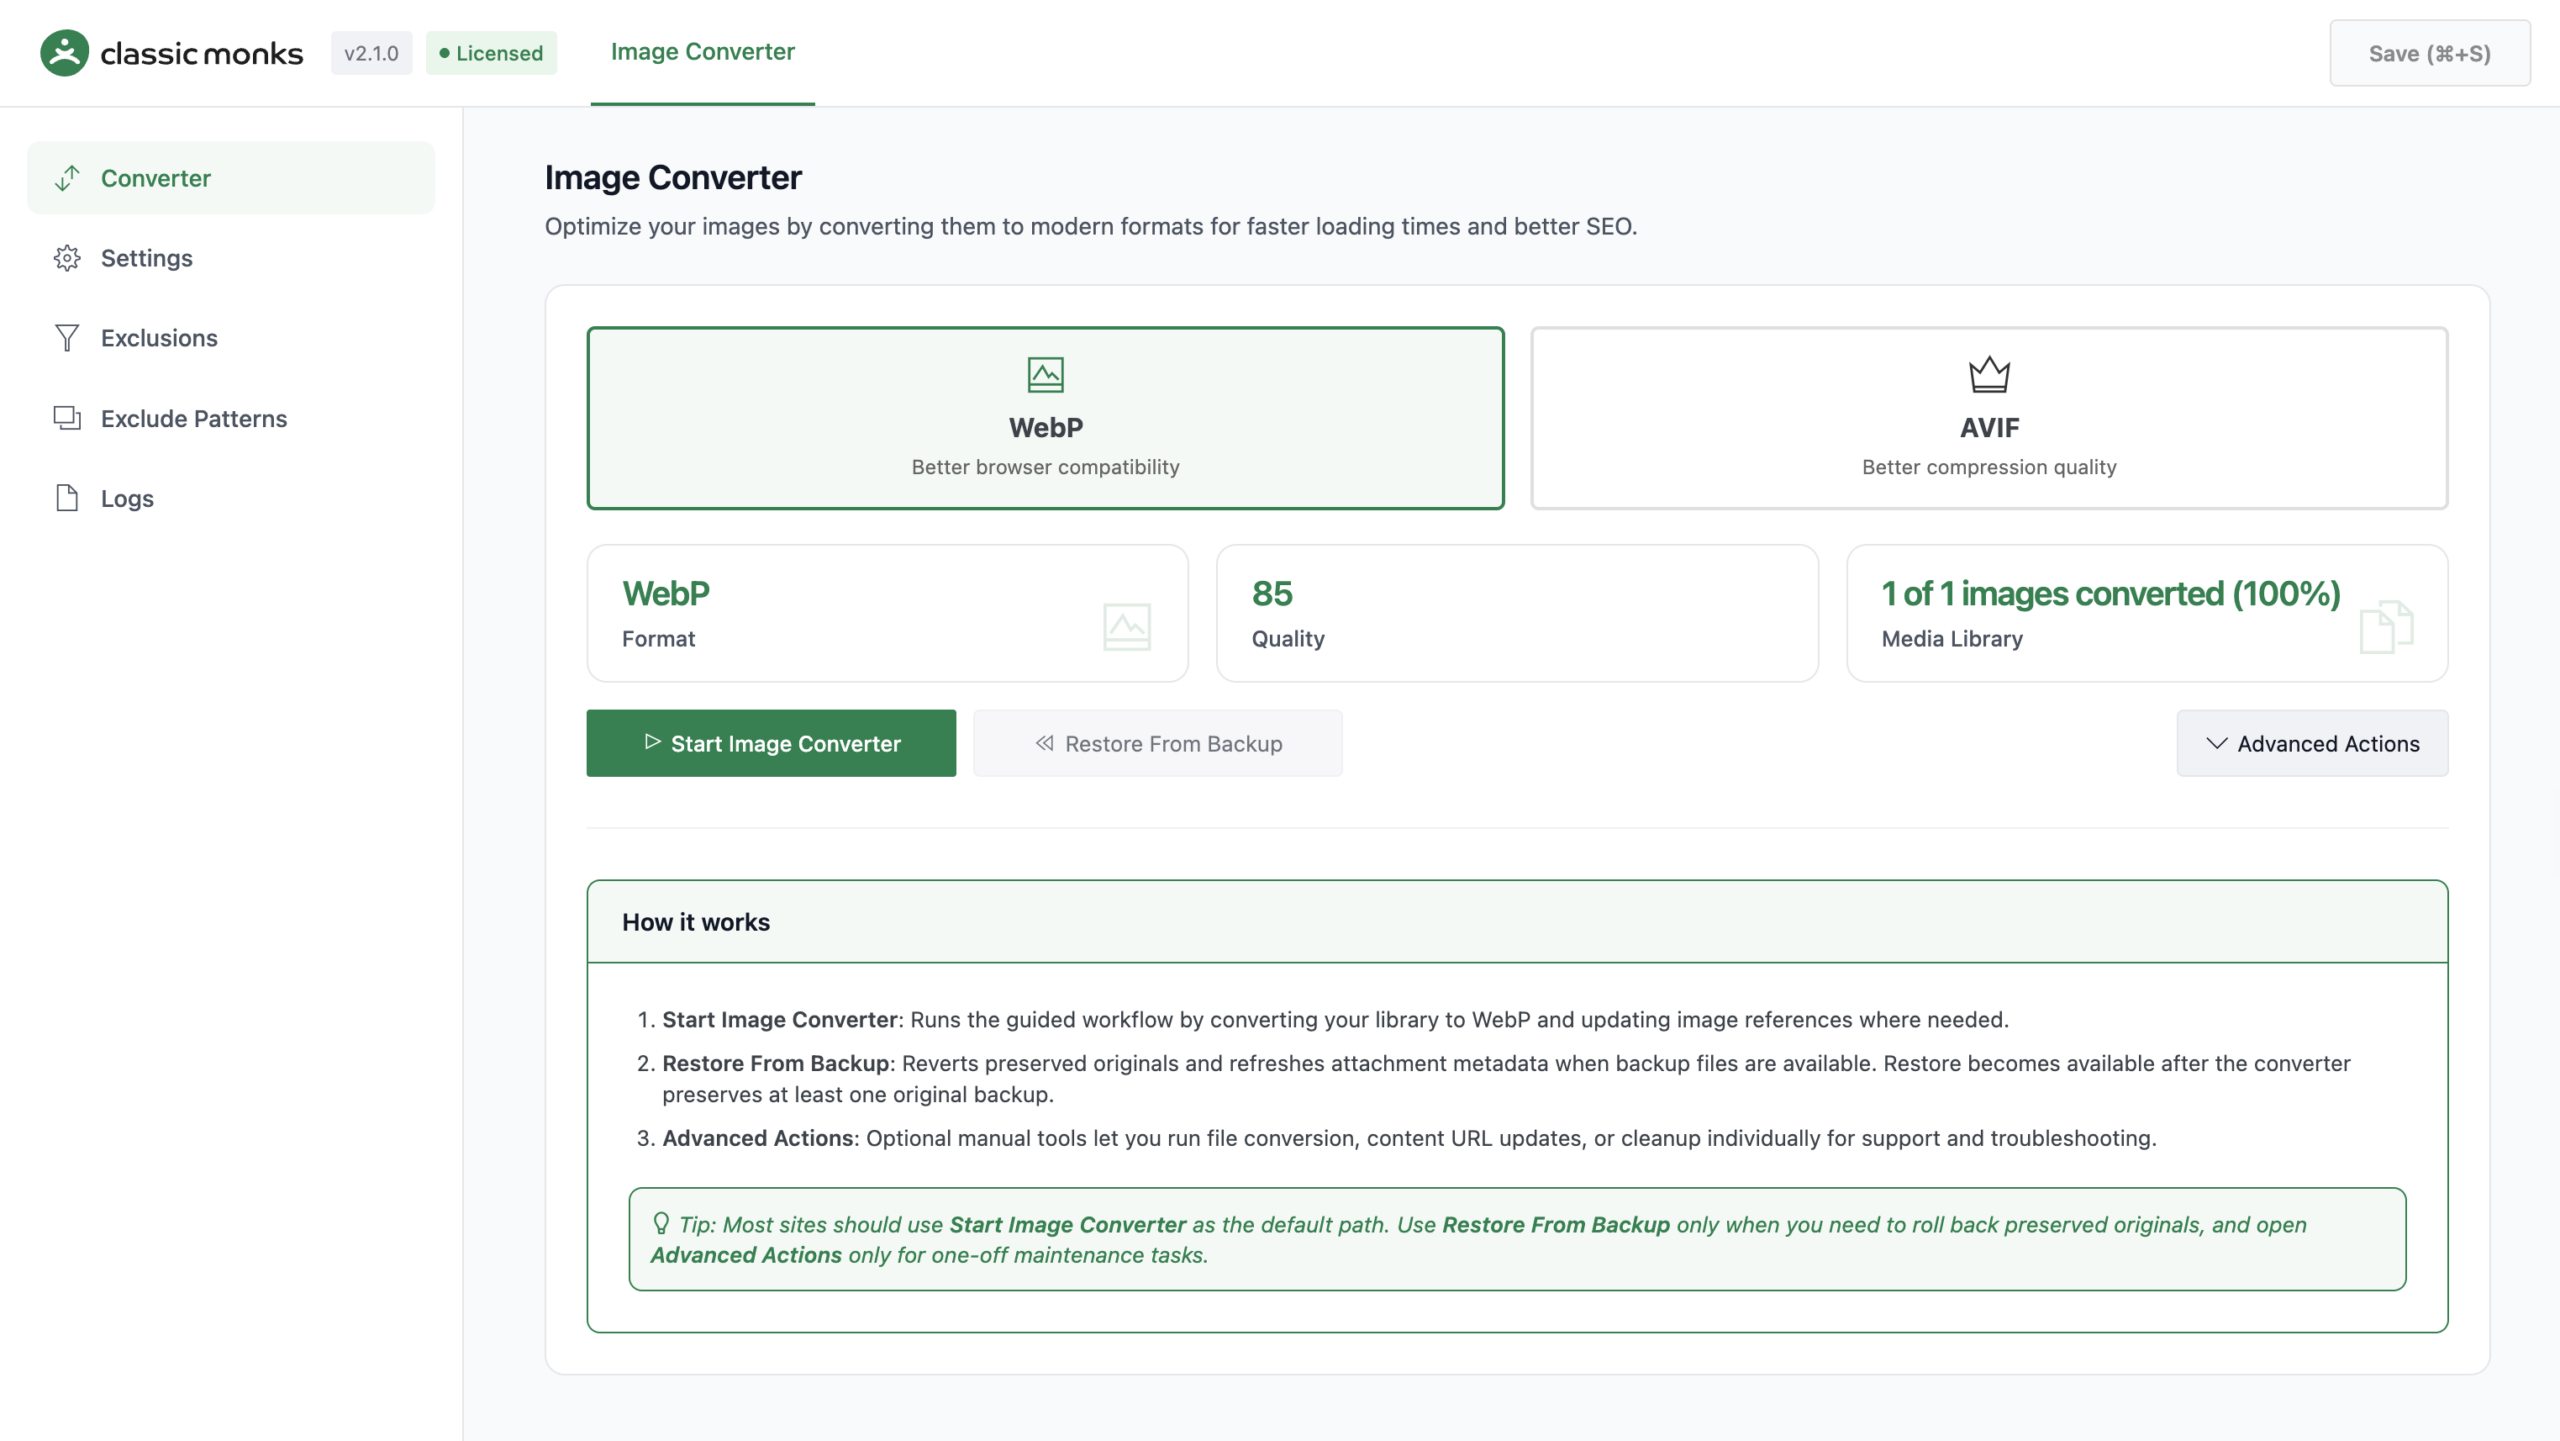
Start in Converter.
Step 3: Choose the output format
Choose one of the format cards:
- WebP: Better browser compatibility
- AVIF: Better compression quality, but requires server AVIF support
Switching formats requires reconverting the images for consistency. Confirm the format change when prompted.
Step 4: Review the conversion status
The Converter panel shows:
- Format
- Quality
- Media Library progress
The Media Library status displays the number of converted images, total images, and completion percentage.
Step 5: Run the guided workflow
Click Start Image Converter. This is the recommended path for most sites. It converts the files and updates image references where needed.
The progress panel shows processed items and completion percentage. Do not close the browser or run another conversion workflow against the same Media Library at the same time.
Step 6: Verify the result
After completion:
- Open several converted attachments in the Media Library.
- Confirm the attachment MIME type and generated metadata.
- Open pages that use converted images.
- Inspect the rendered image URL and
srcset. - Check the browser Network panel for the expected WebP or AVIF response.
- Compare file size and visible quality.
Step 7: Restore originals if necessary
If Preserve Original Files was enabled and you need to roll back, click Restore From Backup. The button becomes available when restorable originals exist.
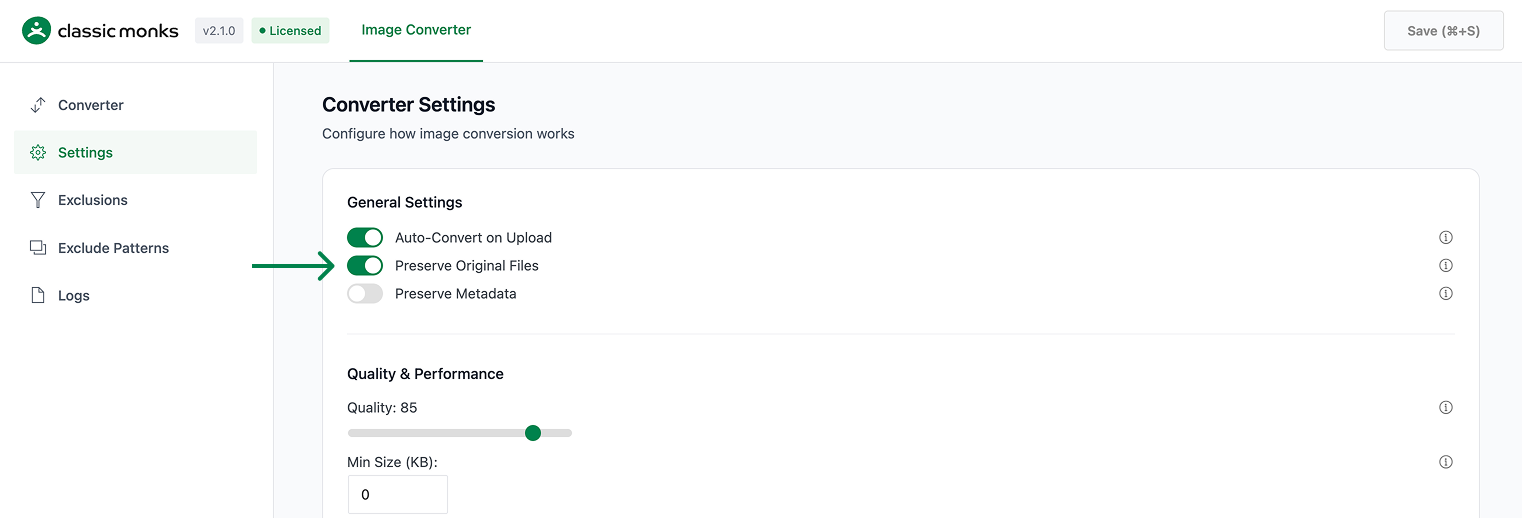
Restore only after confirming the conversion should be reversed. Check the Media Library and frontend again after restoration.
Configure Converter Settings
Open the Settings subtab.
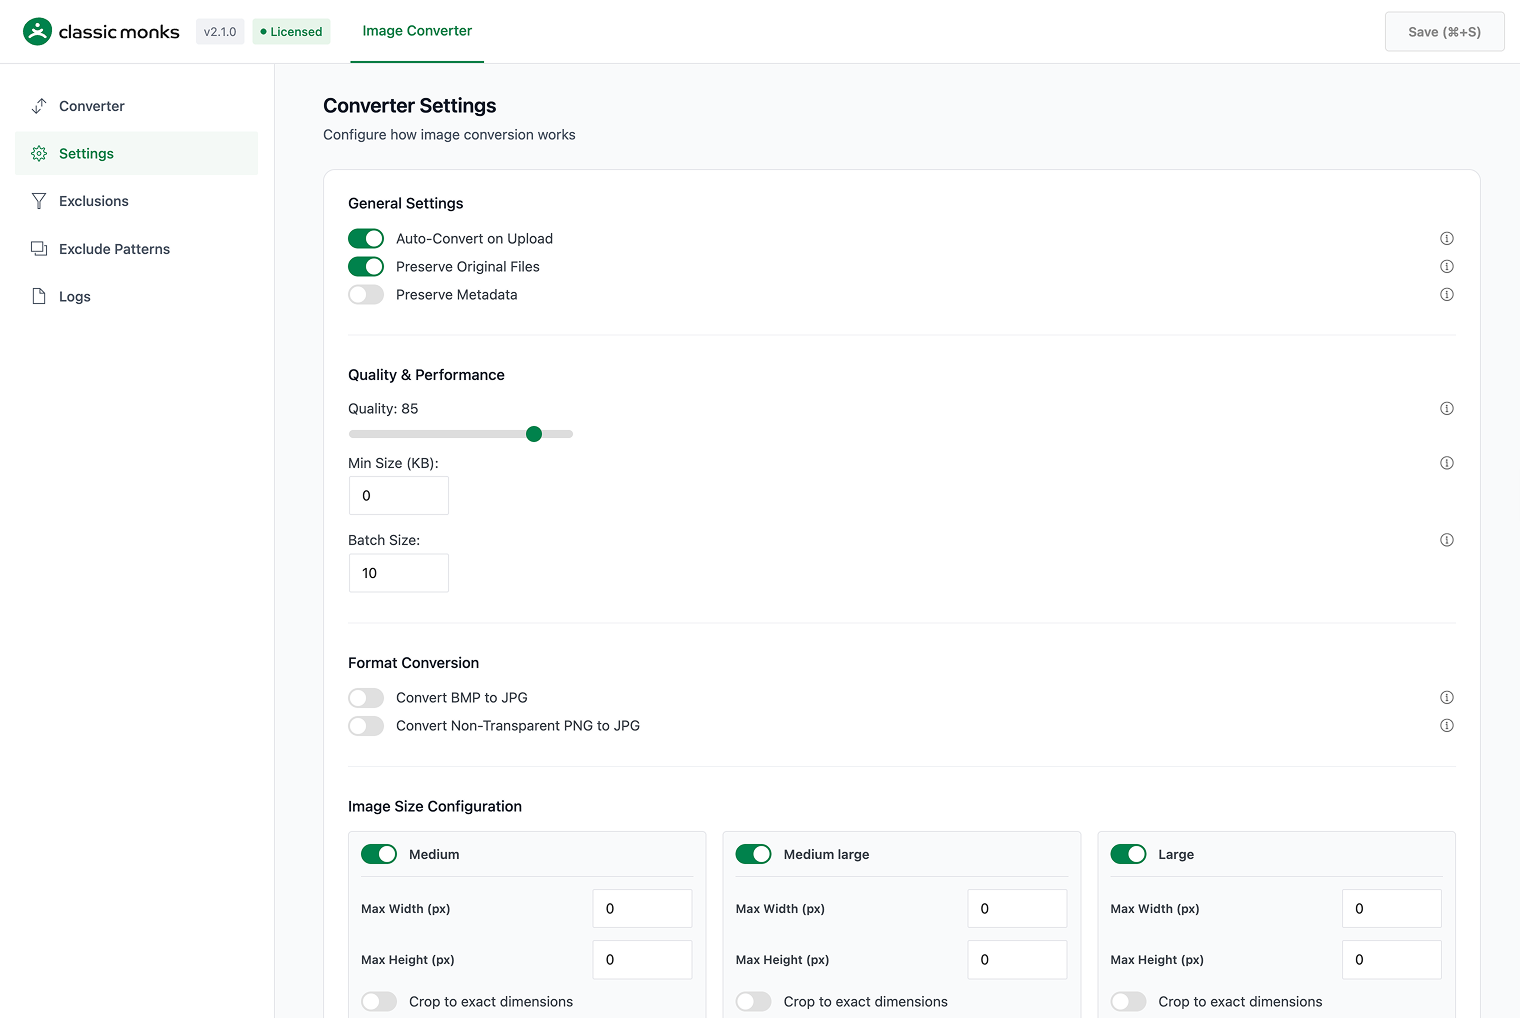
General Settings
| Setting | What it does | Source default |
|---|---|---|
| Auto-Convert on Upload | Converts new image uploads automatically. | On |
| Preserve Original Files | Keeps the original JPG/PNG files after conversion. | On |
| Preserve Metadata | Keeps EXIF and other embedded metadata. | Off |
Preserving metadata can increase file size and retain information you may not want to publish. Keep it off unless the metadata is required.
Quality and performance
| Setting | What it does | Source default |
|---|---|---|
| Quality | Controls output quality from 0 to 100. Lower values produce smaller files. | 85 |
| Min Size (KB) | Skips images smaller than the selected size. 0 converts all eligible images. |
0 |
| Batch Size | Number of images processed in each batch. Valid range is 1 to 50. | 10 |
Start with quality 80–85 and compare representative files. Do not choose a quality value based only on a generic recommendation. Check the actual visual output and file sizes.
Format Conversion
| Setting | What it does | Source default |
|---|---|---|
| Convert BMP to JPG | Converts BMP files to JPG before further processing. | Off |
| Convert Non-Transparent PNG to JPG | Converts PNG files without transparency to JPG. Transparent PNG files remain unchanged by this rule. | Off |
Image Size Configuration
The settings panel lists registered WordPress image sizes. For each size you can configure:
- Enable or disable the size
- Max Width (px)
- Max Height (px)
- Crop to exact dimensions
A value of 0 means no constraint for that dimension. These settings affect generated converted sizes and can change the number and dimensions of files produced.
Click Reset Defaults only when you intentionally want to restore the converter’s default settings and registered size configuration.
Exclude Images from Conversion
Open the Exclusions subtab.
- Click Select Images.
- Choose attachments that must remain in their original format.
- Review them in the Excluded Images list.
- Remove an image from the list when it should be eligible for conversion again.
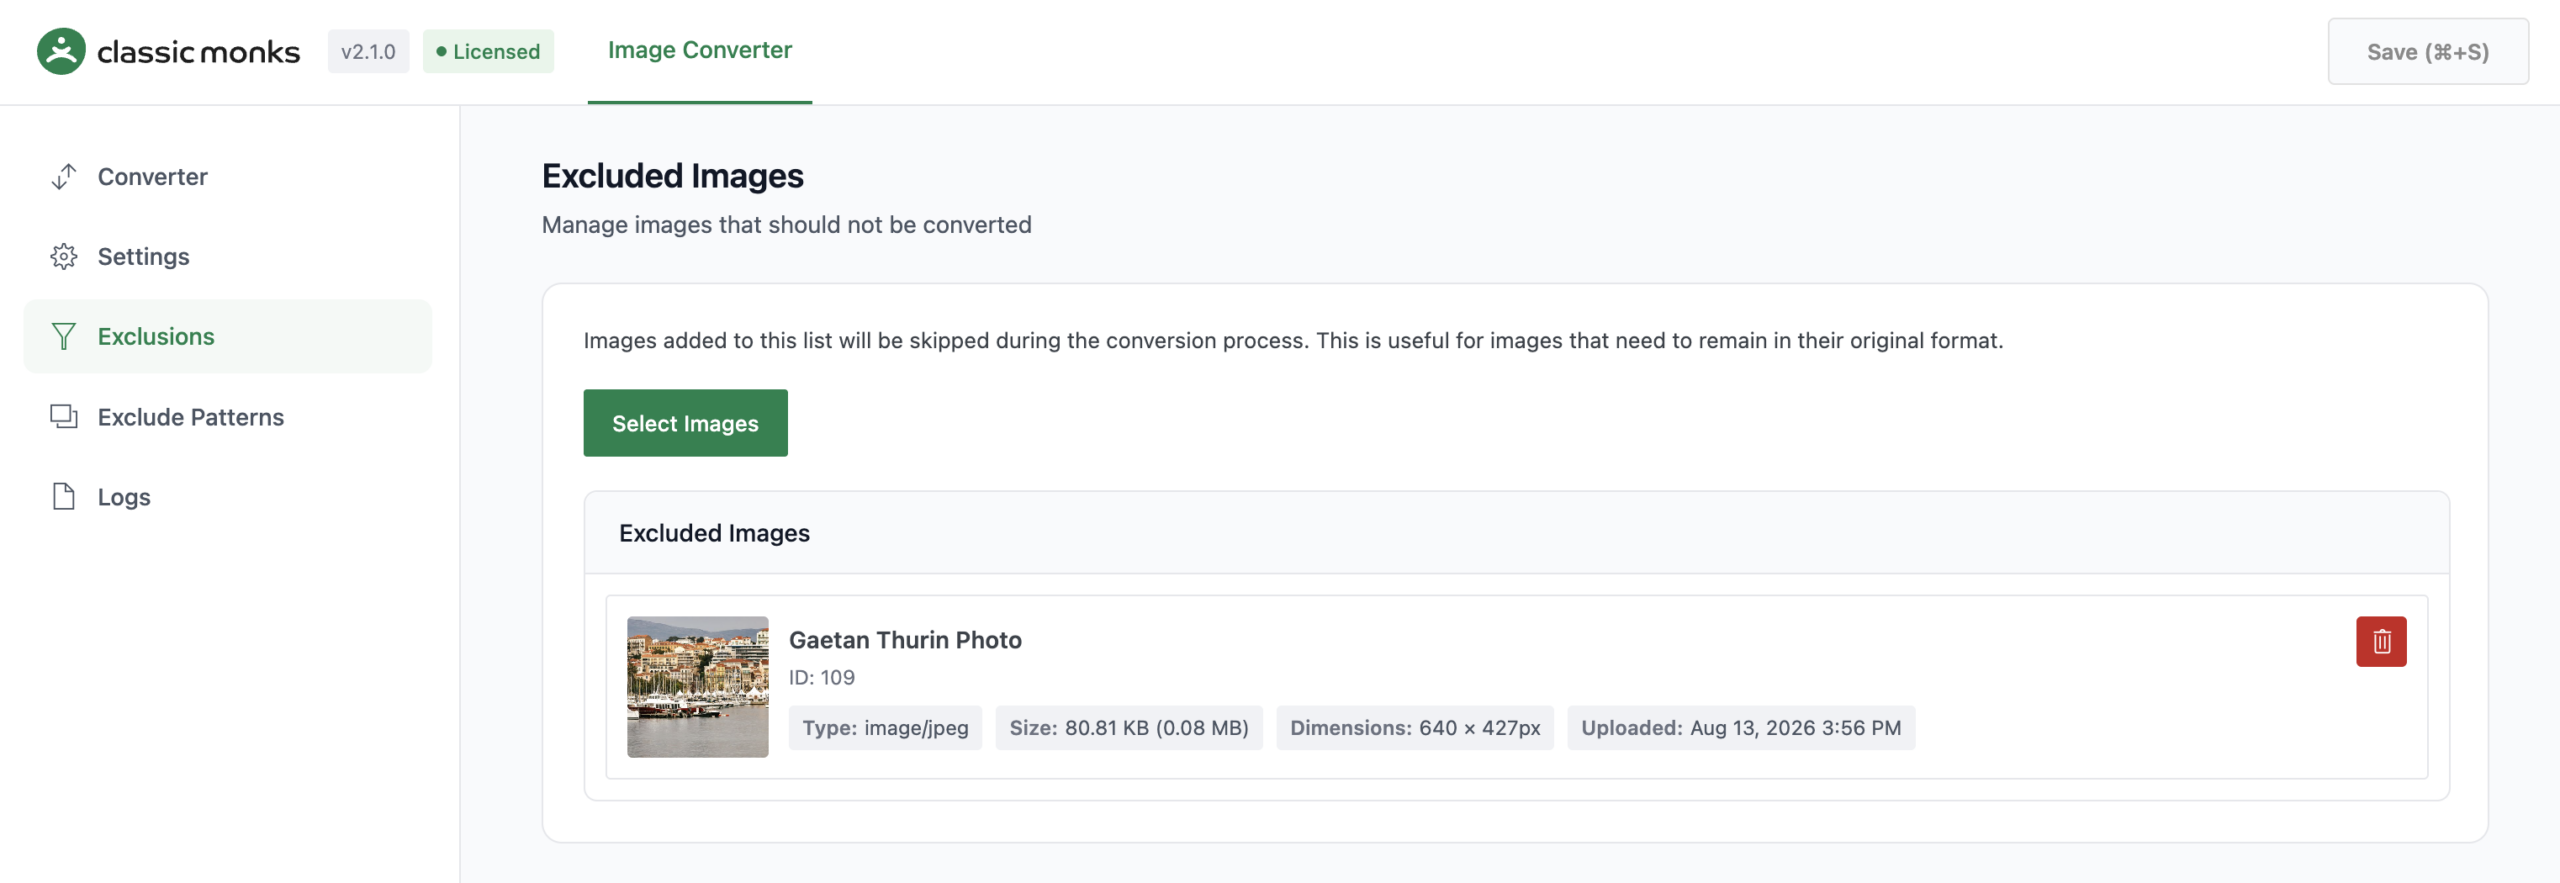
Use exclusions for:
- Images with a format-dependent workflow
- Files used by external systems that expect the original extension
- Images where conversion produces a larger or visibly worse result
- Assets that should not be modified during a migration
Exclude Images by Filename Pattern
Open Exclude Patterns to create rules that automatically skip files.
Add a pattern
- Choose Pattern Type:
- Starts with (Prefix)
- Ends with (Suffix)
- Contains
- Regular Expression
- Enter the Pattern value.
- Click Preview to see how many images match.
- Review the preview list.
- Click Add Pattern only after the preview is correct.
- Review the Active Patterns list.
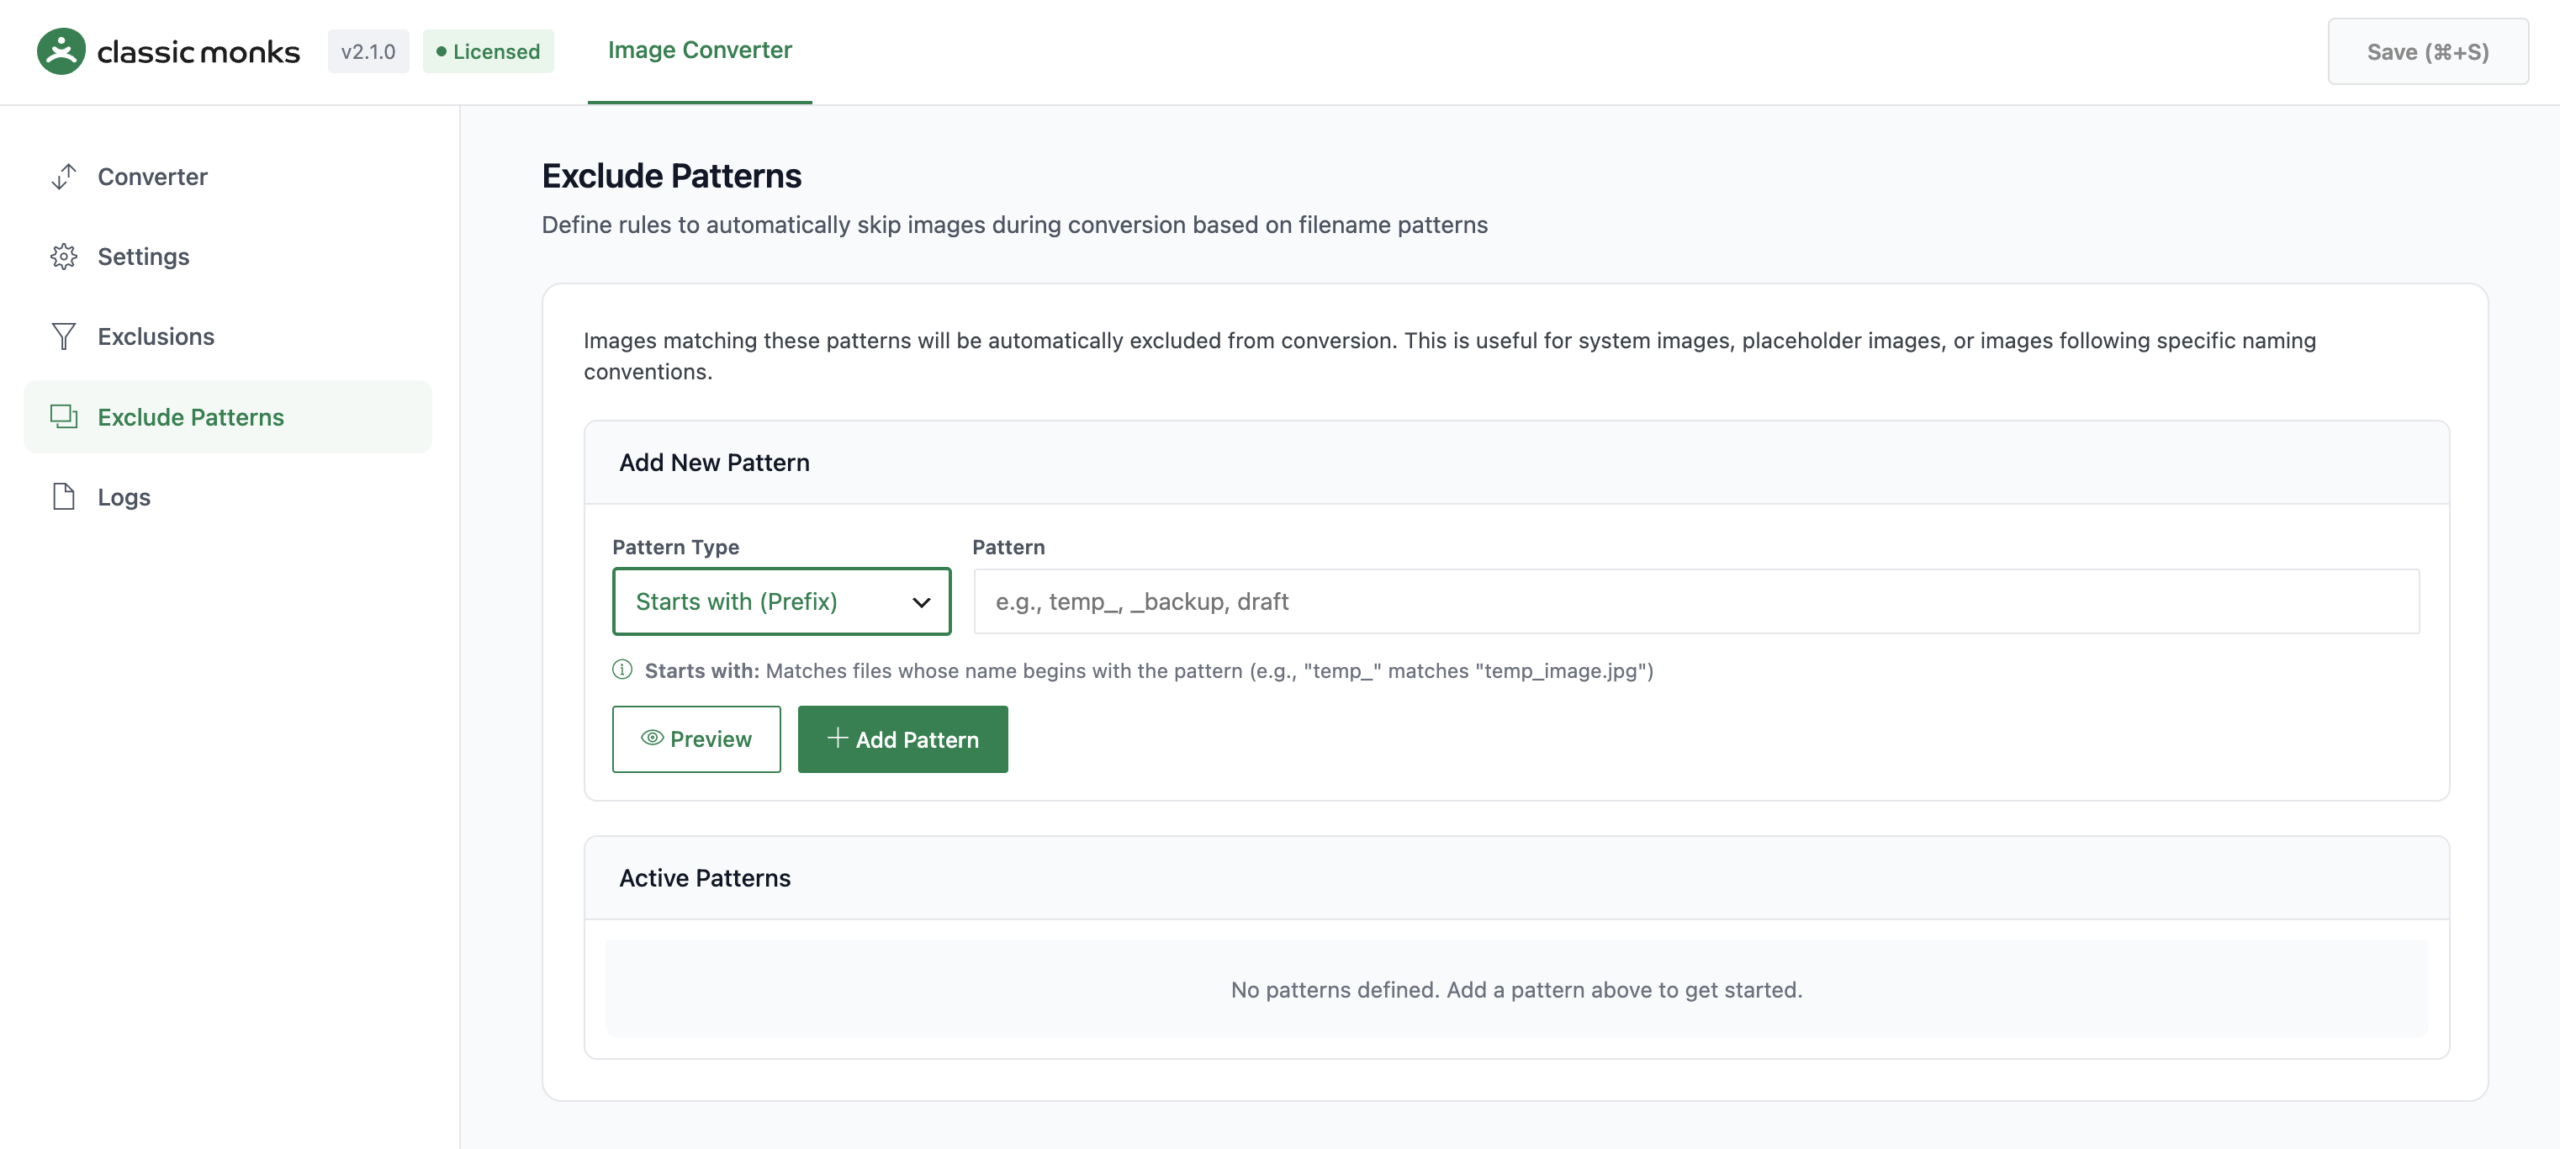
Examples:
| Pattern type | Example | Use |
|---|---|---|
| Starts with | temp_ |
Skip temporary files |
| Ends with | _backup |
Skip backup variants |
| Contains | original |
Skip files containing a known marker |
| Regular Expression | A tested regex | Skip a complex naming pattern |
Preview regular expressions against the real Media Library before adding them. A broad pattern can exclude more images than intended.
Advanced Actions
The Converter subtab includes an Advanced Actions menu. Use these tools only when you understand the consequence of each operation:
- Convert Files Only: Runs file conversion without the complete guided workflow
- Update Content URLs: Updates image URLs stored in post content
- Cleanup Unused Image Files: Removes unused image files
The cleanup action is destructive. Confirm that you have a backup and that the files are genuinely unused before running it.
Use the guided Start Image Converter workflow for normal conversion. Use Advanced Actions for one-off maintenance or troubleshooting.
Review Conversion Logs
Open the Logs subtab to review conversion activity.
- Click Refresh Logs to load the latest entries.
- Click Clear Logs to remove the recorded conversion log.
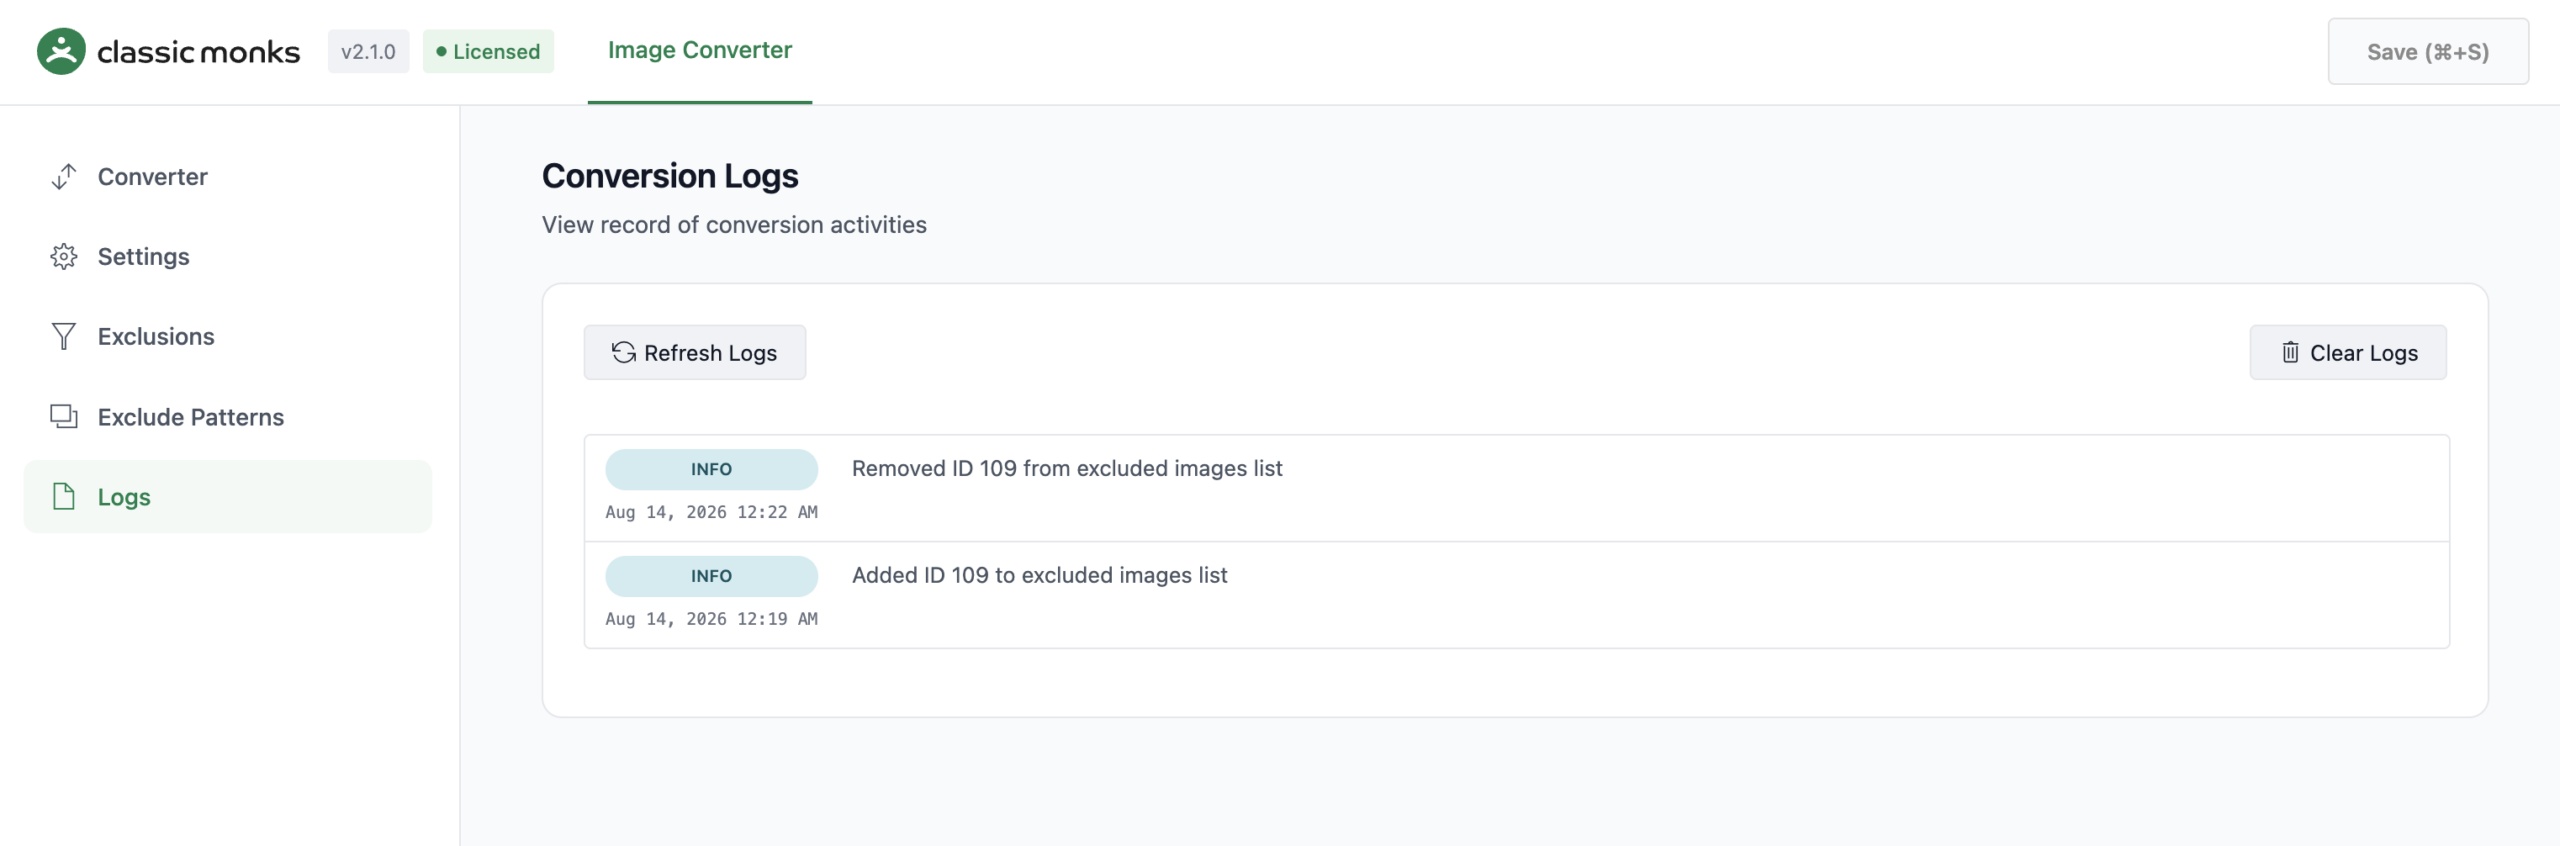
Use the logs to identify skipped files, unsupported formats, failed conversions, larger-output skips, and cleanup results.
Verify Image Optimization
Use a repeatable before-and-after test:
- Record the original file size, dimensions, and format for a sample.
- Convert the sample.
- Record the output file size, dimensions, and format.
- Open the image at the actual display size and inspect quality.
- Check the page source and
srcsetfor the converted file. - Run Lighthouse or PageSpeed Insights on a representative page.
- Record LCP, total image transfer size, image requests, and layout shift.
Do not claim a fixed percentage reduction. Savings vary by source format, image content, quality, dimensions, and output format.
Developer Notes
Implementation files are under:
functions/media/image-converter/
Important hooks include:
wp_handle_uploadadd_attachmentwp_update_attachment_metadatabig_image_size_thresholdthumbnail_size_wthumbnail_size_hafter_setup_themeblock_editor_settings_allwp_calculate_image_srcset
The converter also exposes AJAX actions for conversion, progress, exclusions, restore, cleanup, logs, and settings. Verify nonce and capability requirements in class-image-converter-ajax.php before integrating custom tooling.

Add your first comment to this post