




What Is the Post Type Switcher?
The Post Type Switcher is a small but powerful Classic Monks feature that adds a Post Type dropdown to the post edit screen. The dropdown appears in the Publish meta box (right sidebar, classic editor) and lists every public post type registered on your site. Pick a different type, save the post, and the post is now a member of that new type.
The switch preserves all compatible metadata and custom fields, and it moves the post into any taxonomies that exist for the new type. Incompatible fields (e.g., post categories when switching to a page) are dropped cleanly without errors.
Why You Need It
WordPress’s core admin has no native way to change a post’s type. If you originally published something as a “Post” and later realized it should be a “Page” (or a custom post type like “Portfolio”), the default options are:
- Copy the content into a new post of the right type, then delete the original
- Edit the database directly via phpMyAdmin (risky, breaks meta queries, no UI)
- Install a dedicated plugin (yet another plugin to manage)
The Post Type Switcher in Classic Monks does the same thing as a one-click type change, without the manual copy or the database surgery.
How to Use the Post Type Switcher in Classic Monks
Step 1: Navigate to Settings
Click into the Classic Monks plugin settings in your WordPress dashboard.
Step 2: Go to the Content Subtab
Click on the Core menu, then click the Content subtab.
Step 3: Enable Post Type Switcher
Toggle on Post Type Switcher. No nested options are needed for this feature; the toggle is a single switch.
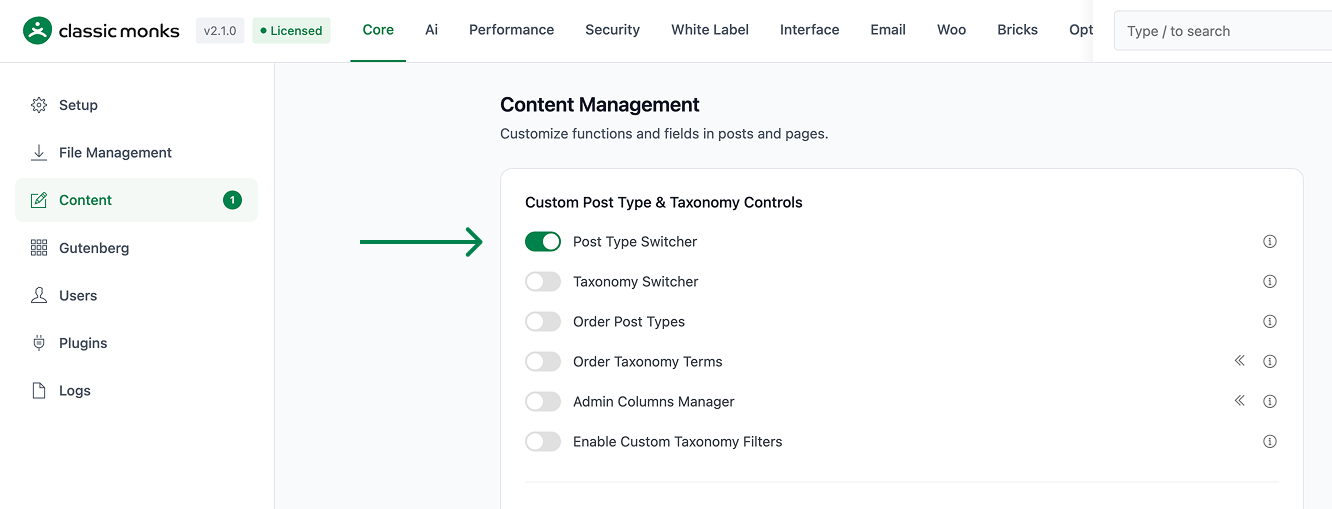
Step 4: Save Changes
Click Save Changes.
Step 5: Open Any Post’s Edit Screen
In the WordPress admin, go to Posts > All Posts (or any post type list), and click Edit on the post you want to switch.
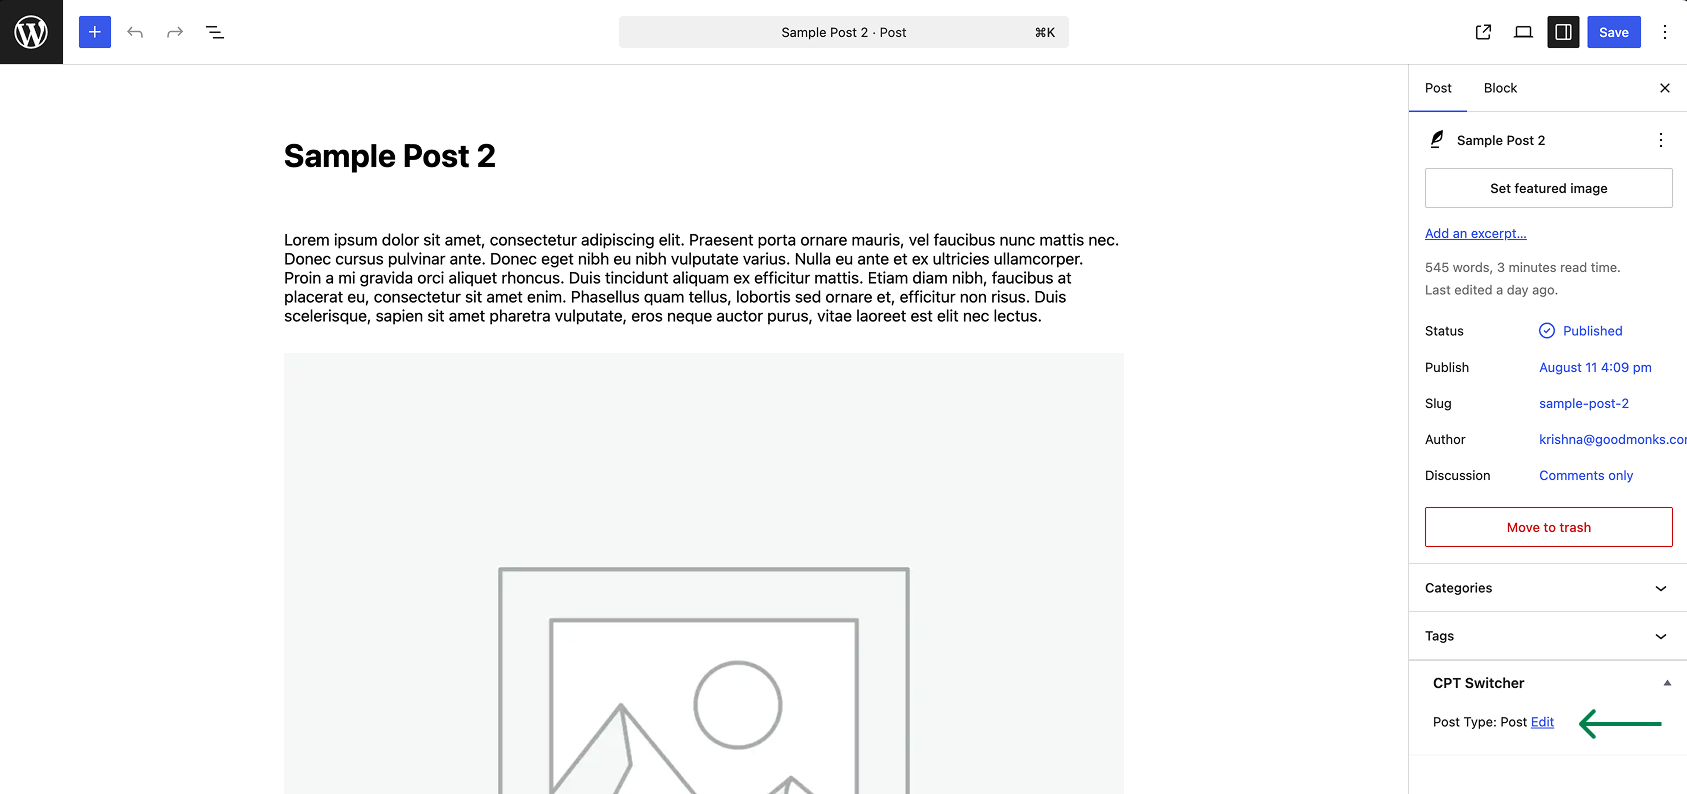
Step 6: Use the New “Post Type” Dropdown
In the right sidebar’s Publish meta box, find the new Post Type dropdown. It lists every public post type on your site. Select the target type from the dropdown.
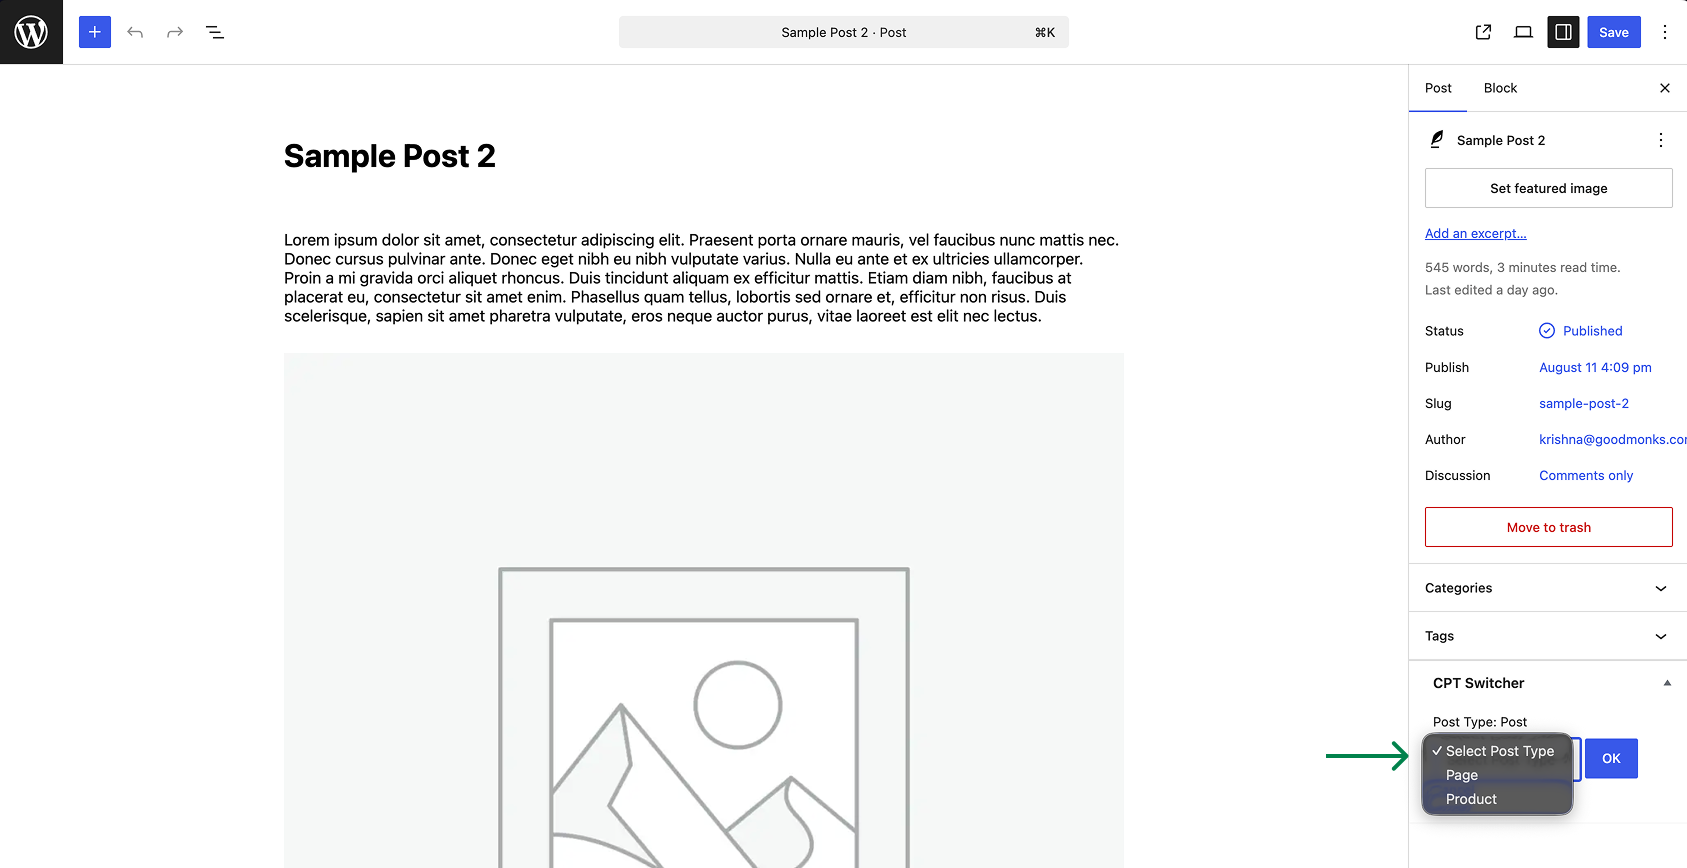
Step 7: Save the Post
Click Update in the Publish meta box. The post is now the new type. The post ID, all compatible meta, all compatible taxonomies, and the content body are preserved.
Step 8: Verify the Switch
Reload the post list filtered by the new type. Your post should appear in the new type’s list. The URL slug also updates to match the new type’s permalink structure.
Configuration Options
| Option | Description | Default |
|---|---|---|
| Post Type Switcher | Master toggle. Adds the dropdown to the post edit screen. | Off |
There are no per-post-type controls; the toggle is global.
What Gets Preserved vs. Dropped
| Data Type | Switched to compatible type | Switched to incompatible type |
|---|---|---|
| Post title, content, excerpt | Preserved | Preserved |
| Featured image | Preserved | Preserved |
| Custom fields (post meta) | Preserved | Preserved |
| Compatible taxonomies (e.g., post categories when switching from post to custom-post-type-with-categories) | Preserved | N/A |
| Incompatible taxonomies (e.g., post categories when switching to a page) | N/A | Dropped |
| Post author | Preserved | Preserved |
| Post date | Preserved | Preserved |
| Post slug (URL) | Regenerated to match new type’s permalink | Regenerated |
| Comments | Preserved (comments are a separate post type) | Preserved |
| Page-specific attributes (menu order, page template) | N/A | Set to defaults |
| Post format | Preserved if new type supports it | Dropped if new type doesn’t support post formats |
Bulk Switch via List Table
The Post Type Switcher also adds a bulk action to the post list table:
- Go to Posts > All Posts (or any post type list)
- Check the boxes next to the posts you want to switch
- From the Bulk Actions dropdown, select Change post type
- Click Apply
- A confirmation page shows the selected posts and the target type dropdown
- Pick the target type and confirm
Bulk switching is useful for migrating a category of posts (e.g., 30 “news” posts that should all become “press releases”).
Developer Notes
The Post Type Switcher uses a single filter to control which post types are eligible for switching:
// The actual filter used by the plugin
add_filter('cm_post_type_filter', function($args) {
    // $args contains ['public' => true, 'show_ui' => true]
    // Modify to include/exclude specific post types
    return $args;
});
Options used:
| Option | Type | Default |
|---|---|---|
enable_post_type_switcher |
Boolean | false |
The switcher is loaded via cm_post_type_switcher.php in functions/core/content/.

Add your first comment to this post