




What Is Login Page Customization
Login Page Customization is a group of options in the Classic Monks White Label tab that change the appearance of the WordPress login page. It is the first thing a client or user sees when they log in, so making it match your brand leaves a professional impression. The feature covers the logo, the background (color, image, or video), the login form, the navigation links, and the notices.
It is one of the white-label features in Classic Monks. The related features are Custom Login Logo, Login Form Styling, Navigation Links Styling, and Notices & Messages Styling, which group under the Login Page Customization master toggle.
Recommendations Before Enabling
- Use a high-quality background image. The search result guidance for background images applies here: use a sharp, brand-aligned image. Compress it so the login page loads fast.
- Mute background videos. Browsers block videos with audio from autoplaying. If you use a video background, keep Mute Video on so it plays automatically.
- Test on a staging site. Login page changes affect everyone who logs in, so verify on a test environment before applying to production.
Enable Login Page Customization
Step 1: Open the White Label Tab
In your WordPress dashboard, go to Classic Monks and open the White Label tab, then the Login Page subtab.
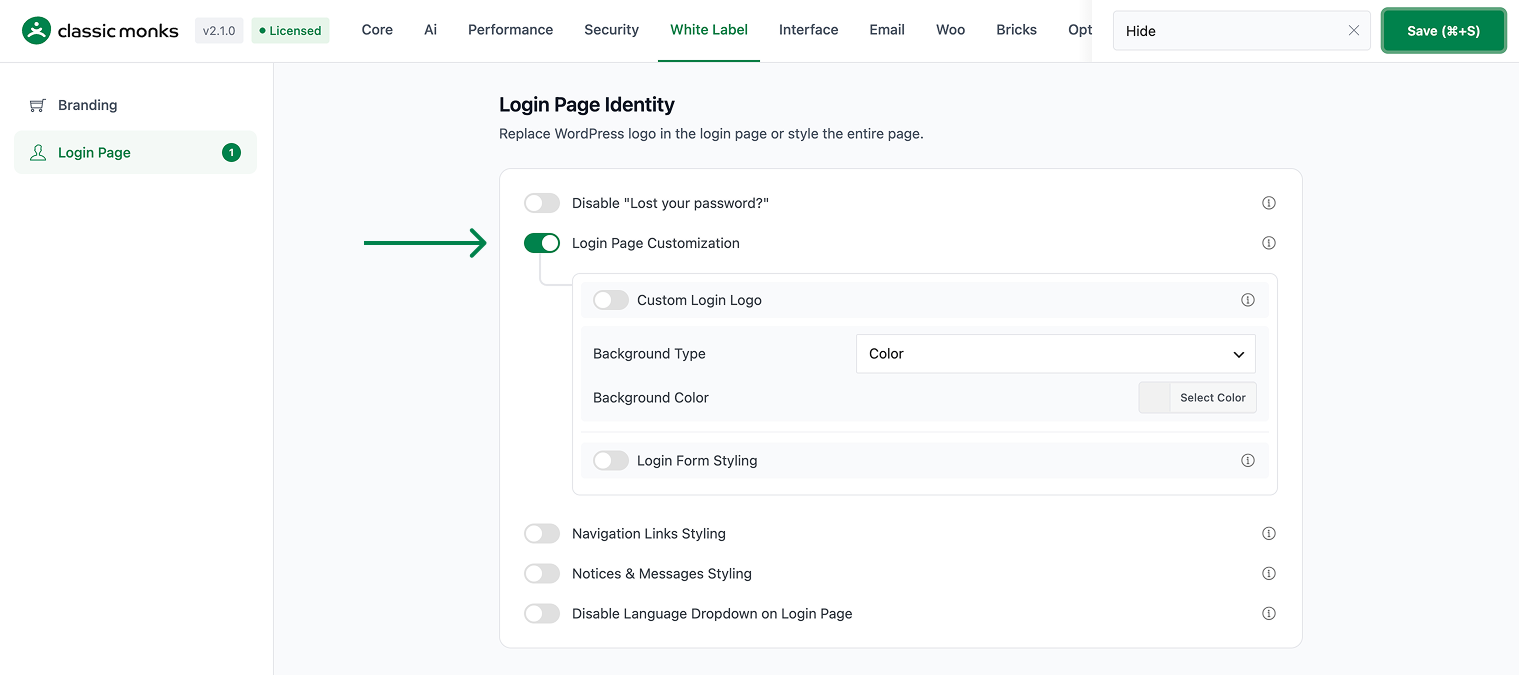
Step 2: Turn On Login Page Customization
In the Login Page subtab, toggle on Login Page Customization. This reveals the logo, background, and form styling options.
Step 3: Add a Custom Logo
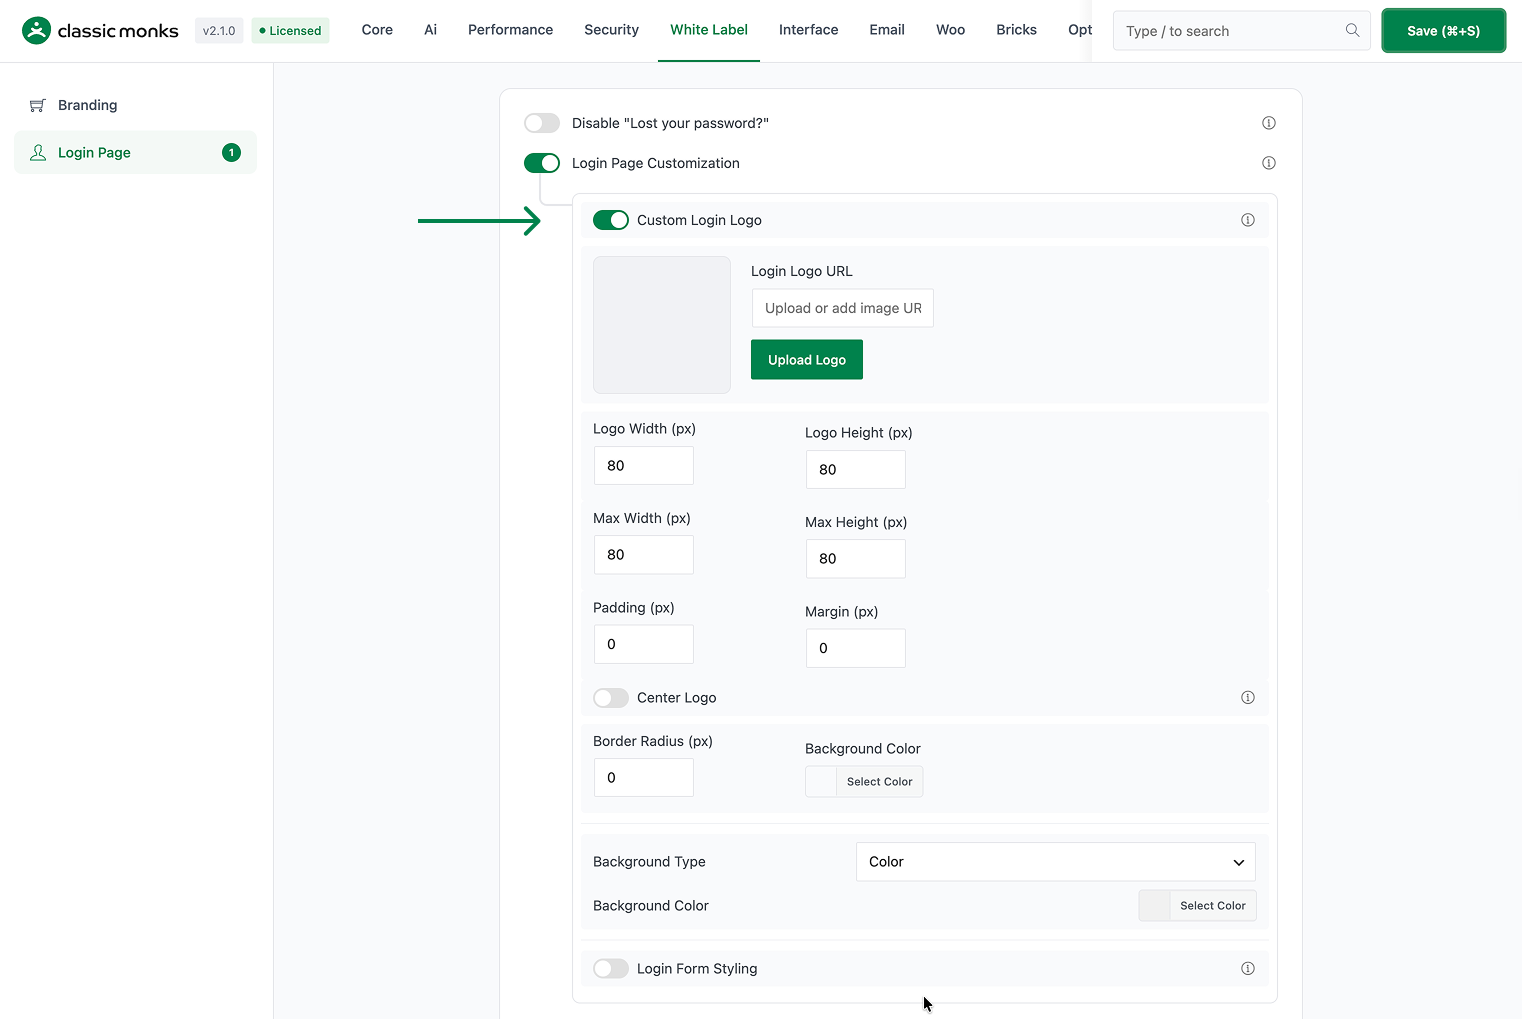
Toggle on Custom Login Logo, then either upload a logo with the Upload Logo button or paste a logo URL into the Login Logo URL field. Set the logo width, height, max width, and max height in pixels. Use Center Logo to keep the logo horizontally centered, and set the padding, margin, border radius, and background color as needed.
Step 4: Set the Background
Choose a Background Type from Color, Image, or Video.
- Color: pick a background color for the login page.
- Image: upload a background image and set its repeat, position, and size. Use Layout Position to choose Default (Full Background), Left Background / Right Form, or Right Background / Left Form for a split layout.
- Video: upload a background video and set its size to Auto, Cover, or Contain. Toggle Mute Video and Loop Video to control playback.
Step 5: Style the Login Form
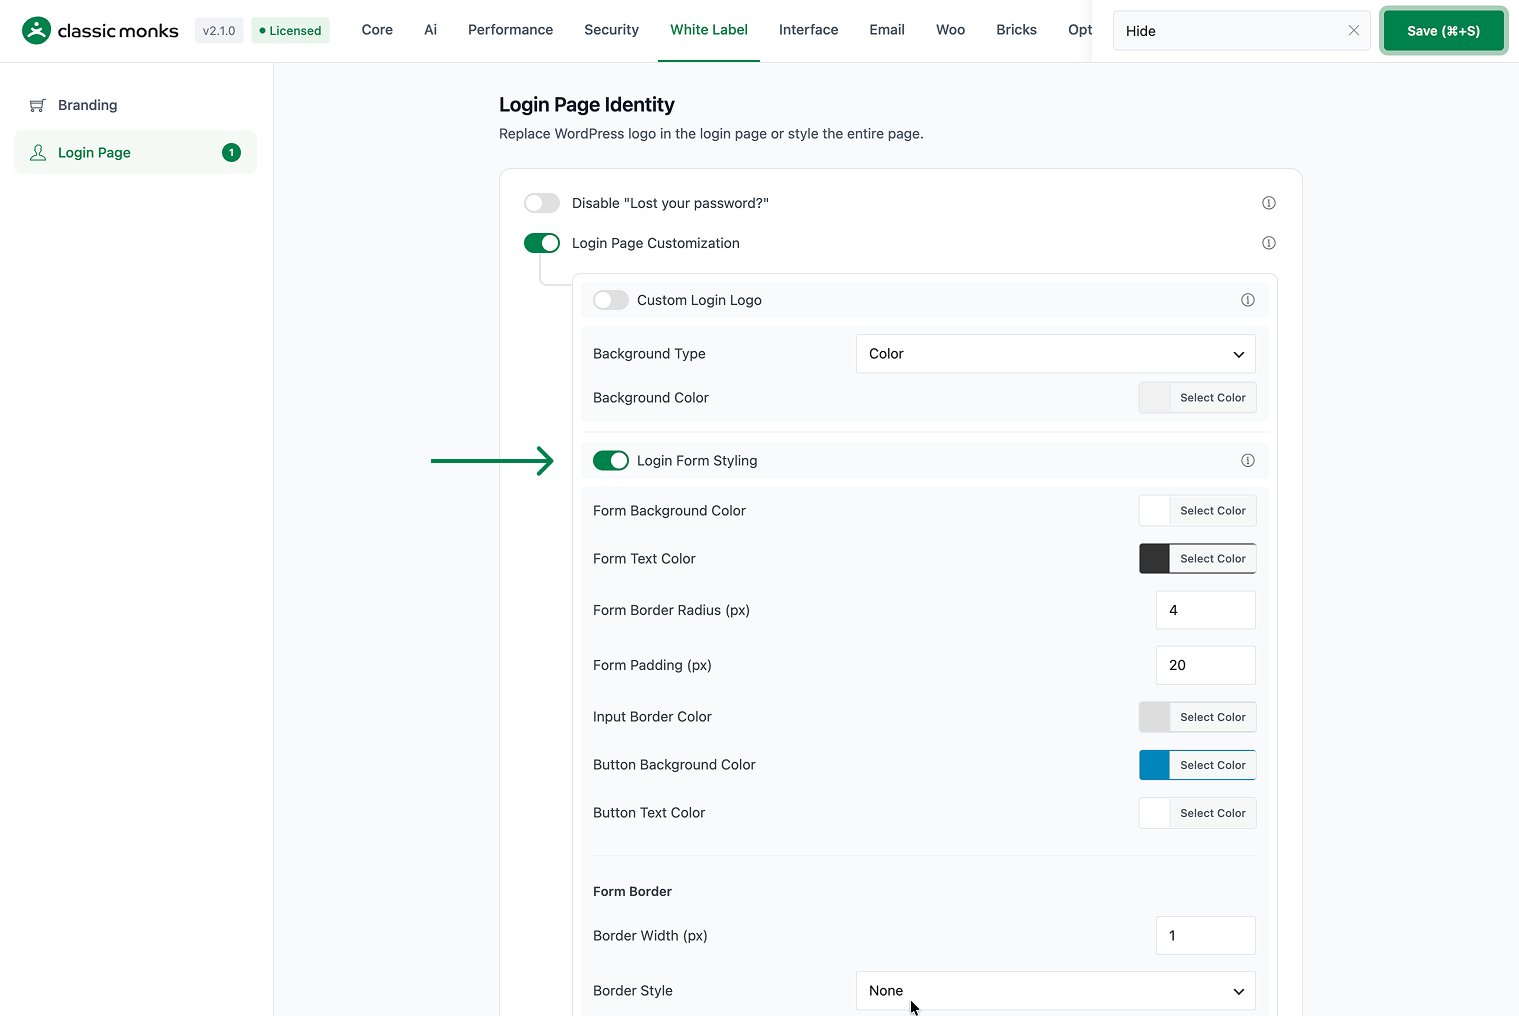
Toggle on Login Form Styling to change the form appearance. Set the form background color, text color, border radius, and padding. Set the input border color, and the button background and text colors. Under Form Border, set the width, style, and color. Toggle Enable Form Shadow and set the shadow color for a subtle depth effect.
Step 6: Save and Test
Click Save (⌘+S). Open the login page in a private browser window to confirm the logo, background, and form styling appear correctly.
Configure Navigation Links and Notices
Navigation Links Styling
Toggle on Navigation Links Styling to control the links below the login form. Toggle Hide “Back to Site” Link to remove the link back to your site, and set the Link Color and Link Hover Color to match your brand.
Notices & Messages Styling
Toggle on Notices & Messages Styling to style the messages that appear on the login page. Set the background, text, and border colors for Error Notices, Success Notices, and Info Messages.
Disable “Lost your password?”
Toggle on Disable “Lost your password?” to hide the password recovery link and prevent the password reset flow on the login page.
Disable Language Dropdown
Toggle on Disable Language Dropdown on Login Page to remove the language switcher from the login page for a cleaner appearance.
Verify It Works
After saving, open the login page in a private browser window and confirm:
- The custom logo appears in place of the default WordPress logo.
- The background color, image, or video displays correctly.
- The login form uses your chosen colors, padding, border, and shadow.
- The navigation links and notices match your styling.
- The “Lost your password?” link and language dropdown are hidden if you disabled them.
If a change does not appear, clear any page cache and reload.
Examples
Example 1: Brand the Login Page for a Client
An agency builds a client site and wants the login page to match the client’s brand. Toggle on Login Page Customization, upload the client’s logo, set Background Type to Image with a brand-colored image, and style the form with the client’s colors. Toggle on Navigation Links Styling and hide the “Back to Site” link for a clean look. The client sees a branded login page instead of the default WordPress one.
Example 2: Use a Video Background for a Modern Look
A product company wants a modern login page. Set Background Type to Video, upload a short brand video, and keep Mute Video and Loop Video on so it plays automatically and continuously. Set the video size to Cover so it fills the screen. The login page now has a dynamic, on-brand background.
Example 3: Split Layout With Form on the Right
A site wants a split login layout. Set Background Type to Image, upload a background image, and choose Layout Position of Left Background / Right Form. The image fills the left side and the login form sits on the right, which works well on desktop and collapses on mobile.

Add your first comment to this post