




What Is Quick Post Nav
Quick Post Nav adds a navigation menu to the WordPress admin bar that lets you jump directly to any post, page, or custom post type without going back to the list screen. Each enabled post type appears as a submenu with its recent posts, so you can open an editor or a specific post in one click.
It is one of three menu tools in the Classic Monks Interface tab, under the Menu Management subtab. The other two are the Admin Menu Manager (for the left sidebar menu) and the Top Toolbar Manager (for the admin bar). Quick Post Nav adds a fast way to reach content from the admin bar.
Recommendations Before Enabling
- You need at least the
edit_postscapability. The menu only appears to users who can edit posts, and each post type only shows to users who can edit that type. - Toolbar items are context-aware. The menu appears in the admin bar on both the frontend and backend, so you can reach content from anywhere in the site.
- Set a limit to keep the menu fast. Each post type lists its recent posts; a large site with many posts can make the menu long. Use the per-type Limit to cap the count.
Enable Quick Post Nav
Step 1: Open the Interface Tab
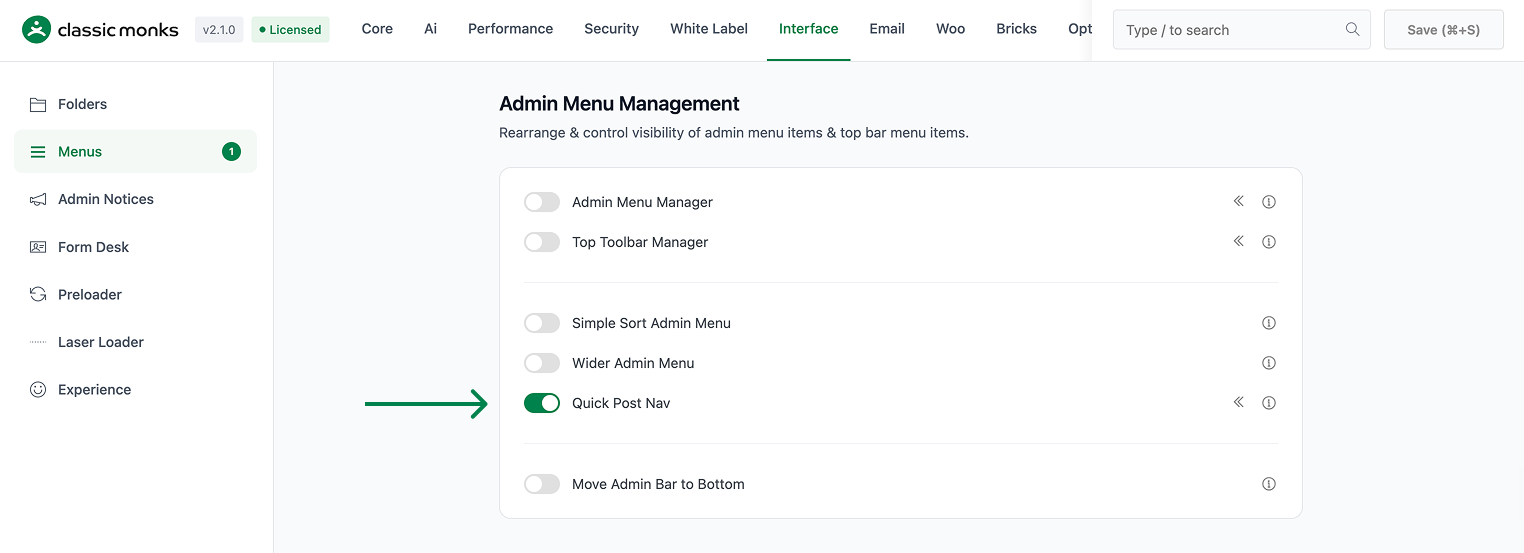
In your WordPress dashboard, go to Classic Monks and open the Interface tab, then the Menus subtab.
Step 2: Turn On Quick Post Nav
In the Menu Management section, toggle on Quick Post Nav.
Step 3: Save and Reload
Click Save (⌘+S). The feature adds a submenu under Classic Monks called Menu. A page reload is required before the submenu appears.
Step 4: Open the Quick Post Nav Editor
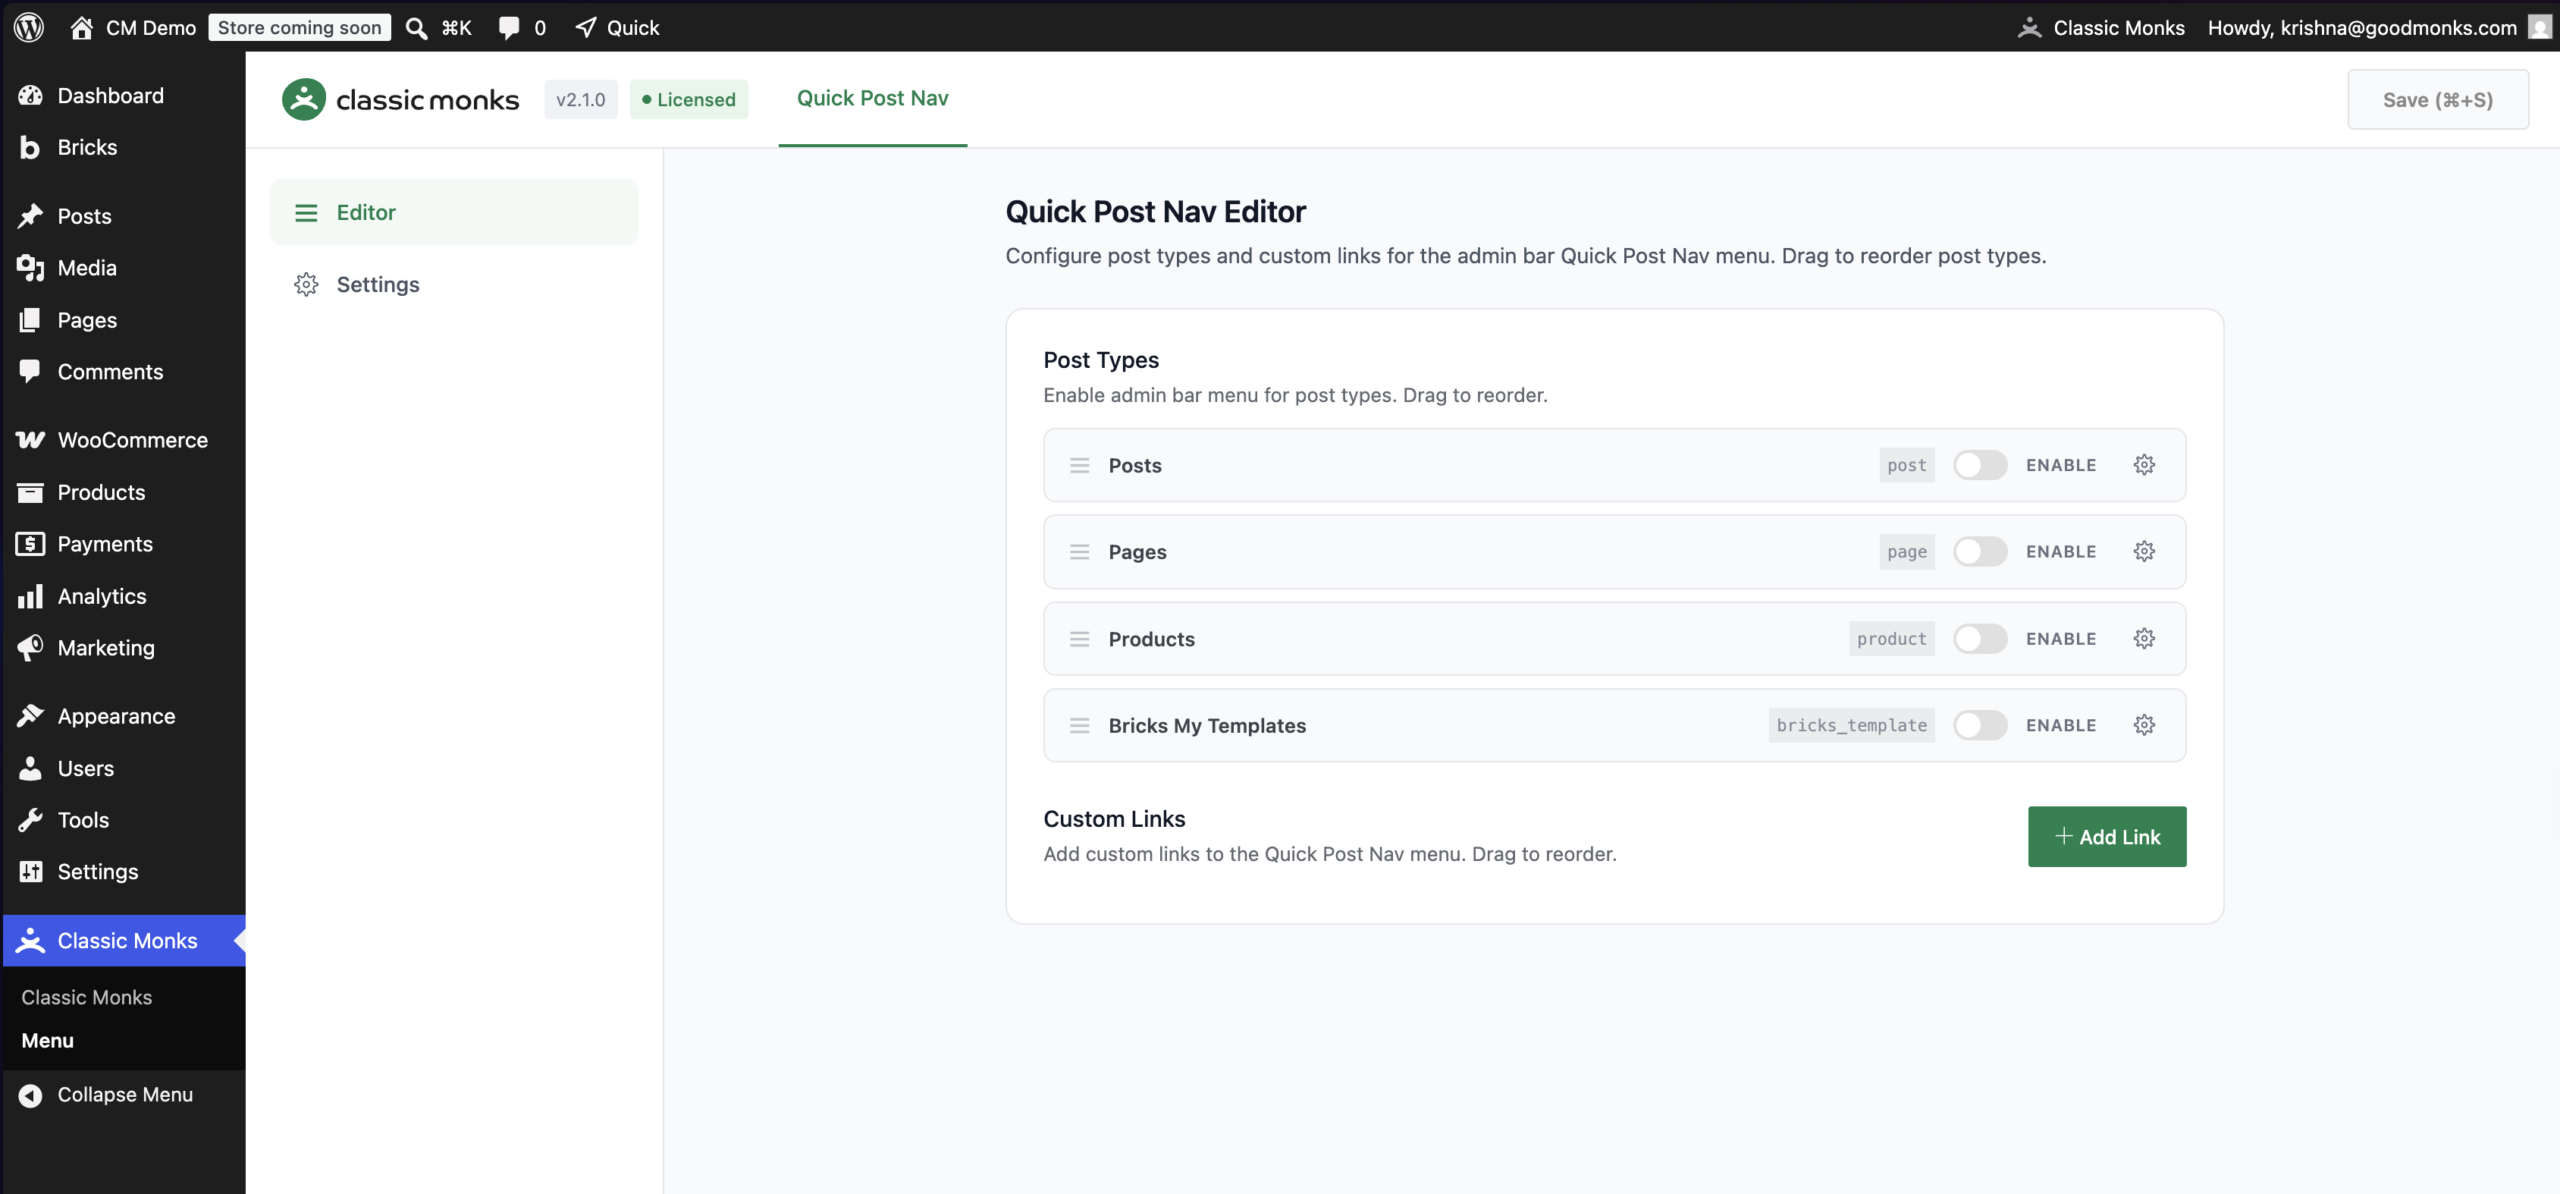
Go to Classic Monks then Menu, and open the Quick Post Nav tab. It has two subtabs: Editor and Settings.
Configure the Editor
The Editor subtab has two sections: Post Types and Custom Links.
Enable Post Types
Under Post Types, each registered post type appears as a row with an Enable toggle. Turn it on to add that post type to the Quick Post Nav menu. Drag rows to reorder how the post types appear in the menu.
Set Post Type Options
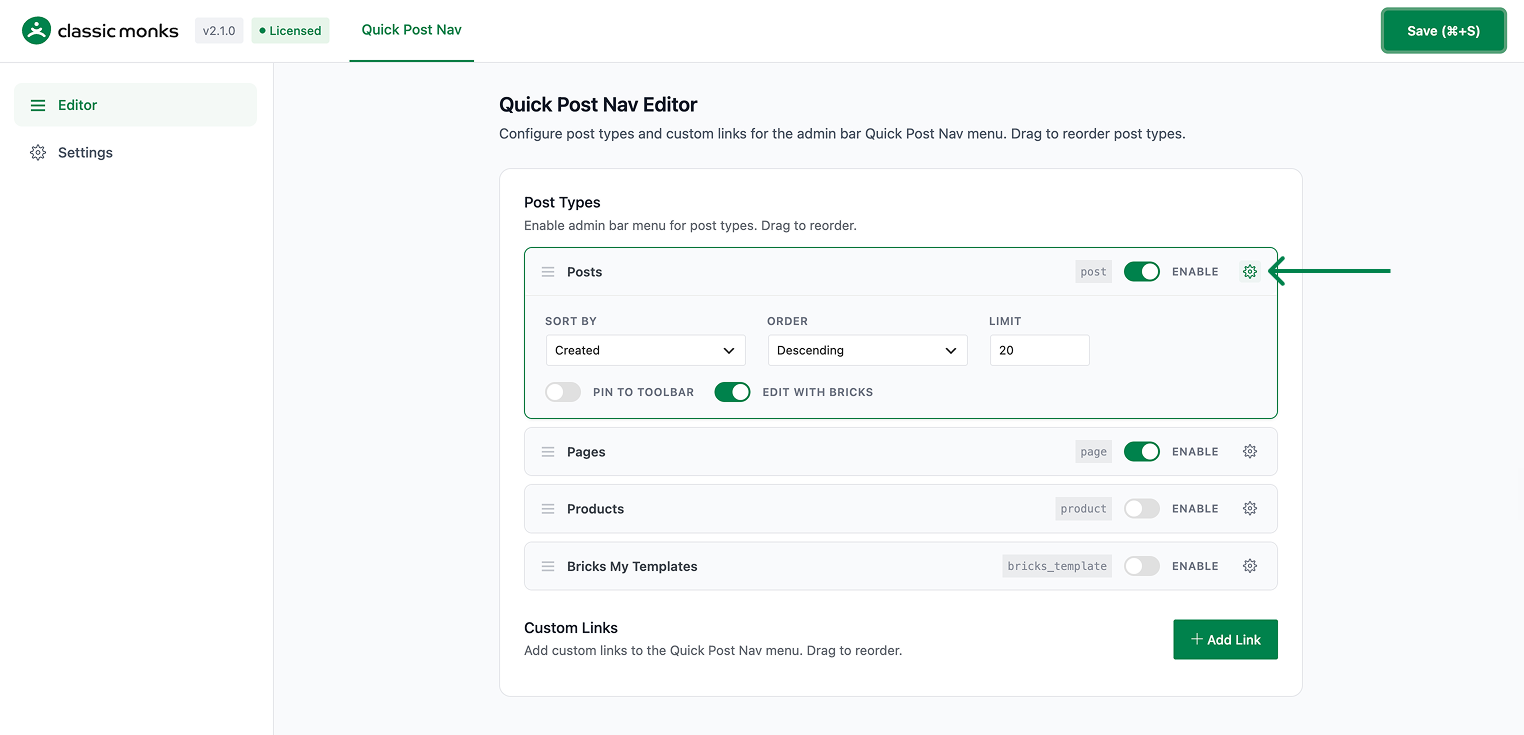
Open the options panel on a post type row to configure:
- Sort By: sort posts by Created (post date), Title, or Menu Order.
- Order: Ascending or Descending.
- Limit: the maximum number of posts to show in the menu (1 to 100). Leave empty to show all.
- Show Hierarchical: for hierarchical post types, show the parent and child structure.
- Pin to Toolbar: when Compact Mode is on, keep this post type visible directly in the admin bar instead of grouping it inside the Quick menu.
- Edit with Bricks (when Bricks Builder is active): add an Edit with Bricks link to each post.
Add Custom Links
Under Custom Links, click Add Link to add a custom menu entry. Enter a Title and a URL. Drag rows to reorder, and use the trash button to remove a link. Custom links appear in the Quick Post Nav menu under a Custom Links group.
Configure the Settings
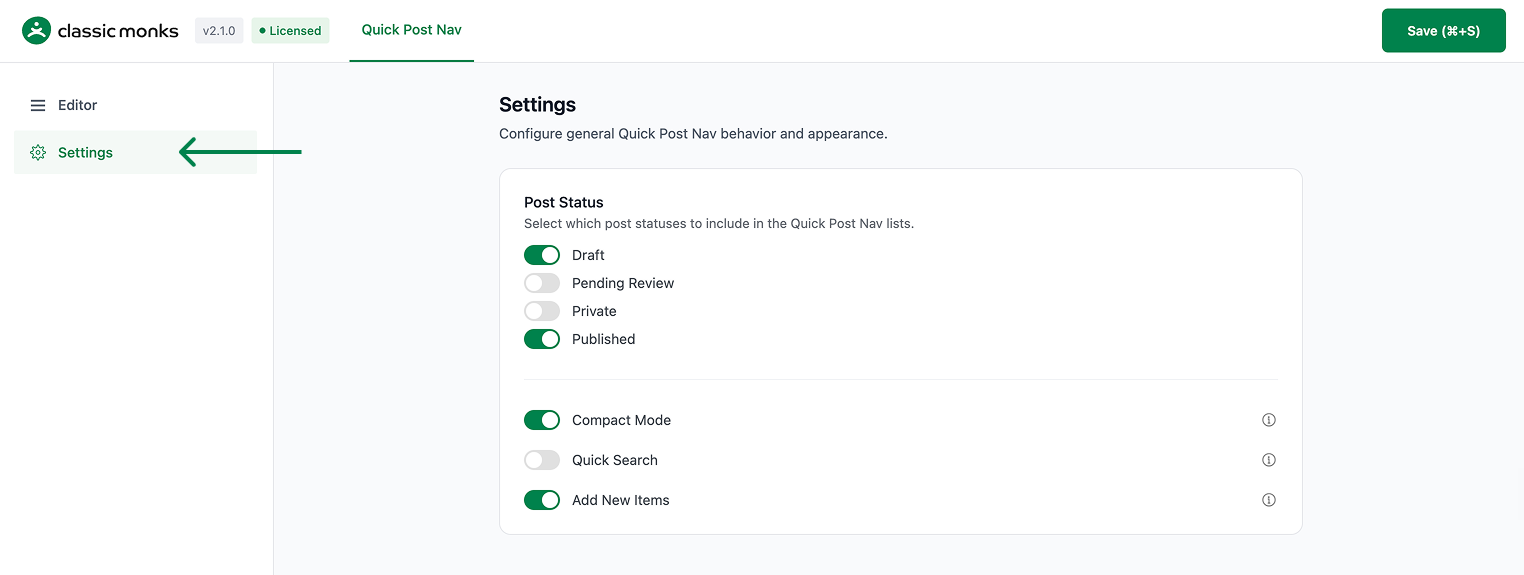
The Settings subtab controls the general behavior of the menu.
Post Status
Choose which post statuses appear in the post type lists: Draft, Pending Review, Private, Published. Posts of the selected statuses show in the menu, with a status label next to non-published posts.
Compact Mode
Turn on Compact Mode to group all post type lists into one Quick menu in the admin bar. Use Pin to Toolbar on individual post types to keep them visible outside the grouped menu. Turn it off to show each post type as its own top-level admin bar item.
Quick Search
Turn on Quick Search to add a search input to each post type menu. Type to filter the posts in that menu.
Add New Items
Turn on Add New Items to show an Add New link at the top of each post type menu, so you can create a new post without leaving the admin bar.
Show Language
When Polylang is active, turn on Show Language to display a language indicator next to each post in the menu.
Verify It Works
After saving, open the admin bar on the frontend or backend of your site and confirm:
- The Quick menu (or individual post type menus) appears with the enabled post types.
- Each post type lists its recent posts, and clicking a post opens its editor.
- Custom links appear in the Custom Links group.
- Post statuses, search, and add-new links behave as configured.
If the menu does not appear, confirm the feature is enabled and that you have the edit_posts capability.
Examples
Example 1: Quick Access to Recent Pages
Enable Pages and set Sort By to Created and Limit to 15. Turn on Compact Mode. The admin bar now shows a Quick menu with a Pages submenu listing your 15 most recent pages, so you can open any page in one click.
Example 2: Add a Common Admin Link
Under Custom Links, click Add Link, enter Settings as the title and options-general.php as the URL. Save. The Quick Post Nav menu now includes a Custom Links group with a direct link to WordPress Settings.
Example 3: Group Everything in One Menu
A client only needs a few post types. Enable Posts and Pages, turn on Compact Mode and Pin to Toolbar for Posts, and leave Quick Search on. The admin bar shows a single Quick menu with pinned Posts visible, plus a search box to filter.

Add your first comment to this post