




What Does Custom Order Status Do?
WooCommerce ships with a fixed set of order statuses: pending payment, processing, on hold, completed, cancelled, refunded, and failed. For many businesses that is not granular enough. A furniture maker tracks orders through “Awaiting Materials”, “In Production”, and “Quality Check”. A service business needs “Scheduled” and “In Progress”. A B2B workflow wants “Pending Approval” and “Invoiced”.
The Classic Monks Enable Custom Order Status feature lets you define your own statuses. Each status is registered with WooCommerce so it appears wherever order statuses are used: the order edit screen, the orders list, and the status dropdown.
Custom statuses work within the standard WooCommerce order workflow rather than as a separate system, so they integrate with how you already manage orders.
When to Enable It
Enable Custom Order Status when the default statuses do not match how your store actually fulfills orders:
- Manufacturing and production workflows that need staging steps
- Service and appointment businesses that track scheduling and progress
- B2B flows with approval or invoicing milestones
- Any workflow where “Processing” and “Completed” are too coarse
Keep it off if the default WooCommerce statuses already cover your process.
How to Add Custom Order Statuses in WooCommerce
Step 1: Enable the Feature
- In WordPress admin, open Classic Monks > WooCommerce.
- Open the Orders settings area.
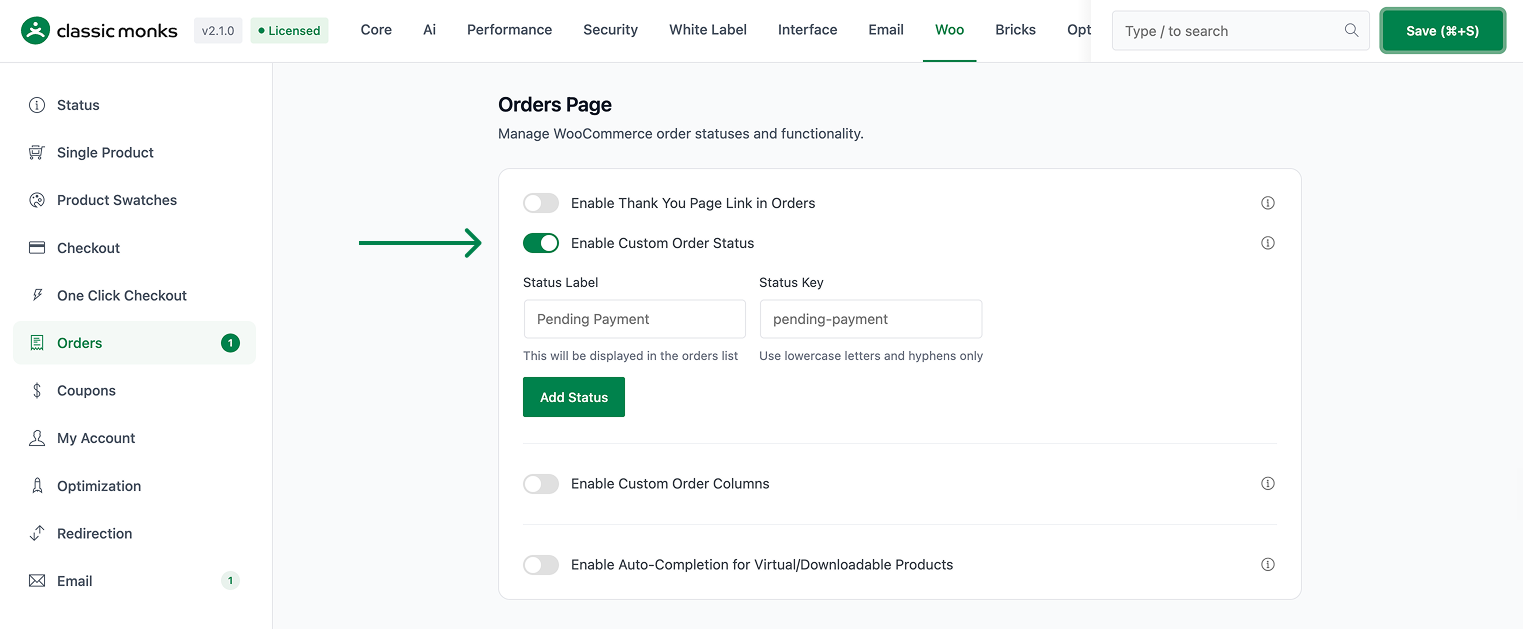
- Toggle on Enable Custom Order Status. The nested add-status form expands below the toggle.
Step 2: Add a Status
- In Status Label, enter the name that appears in the orders list (for example,
In Production). - In Status Key, enter a lowercase, hyphenated identifier (for example,
in-production). - Click Add Status.
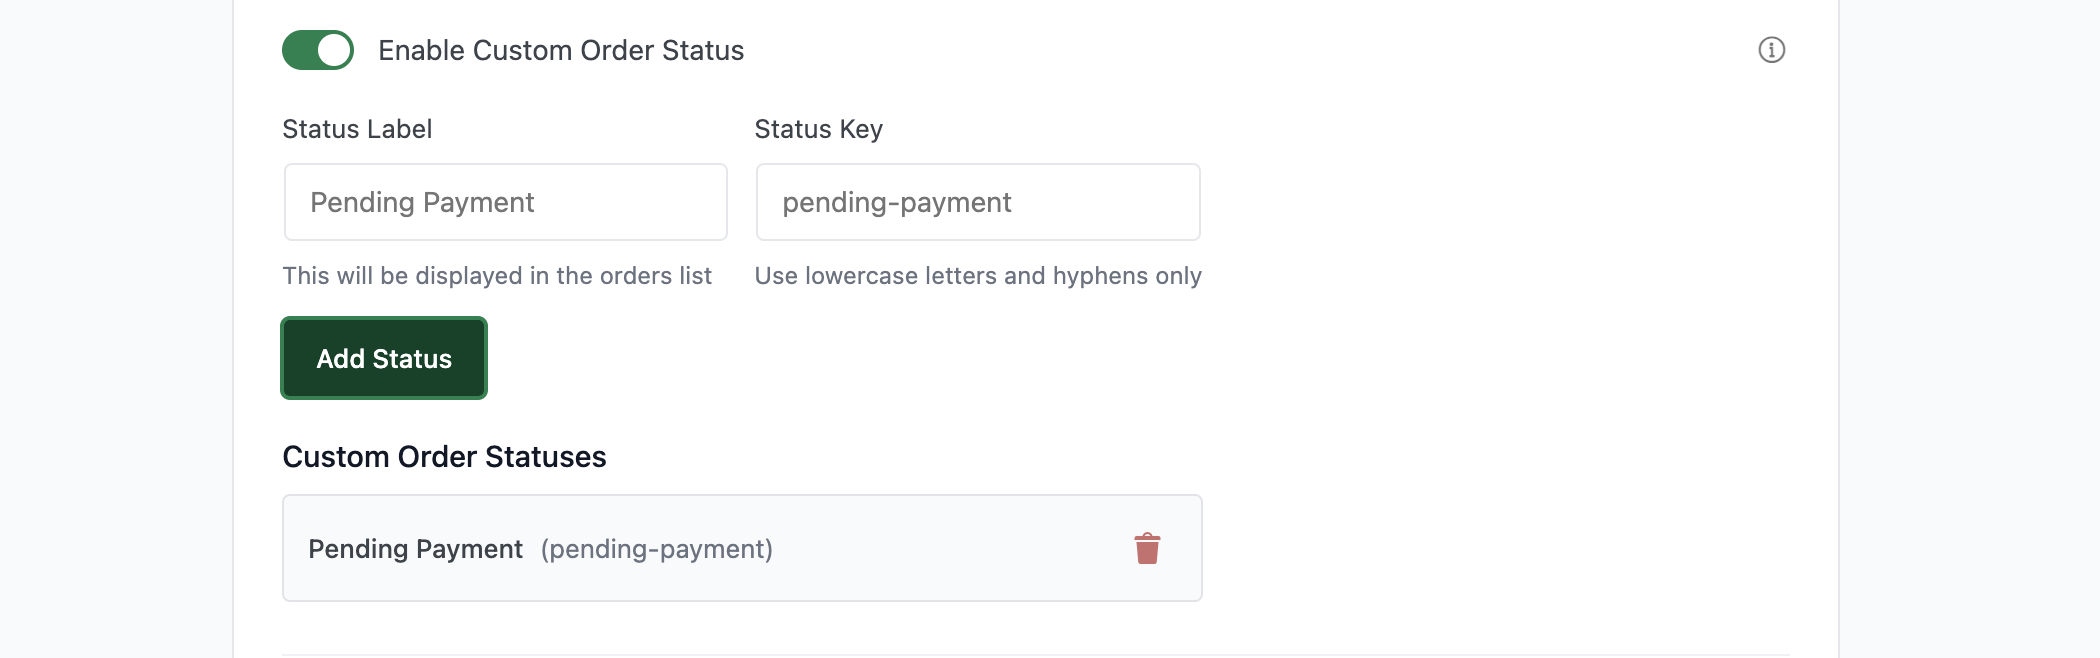
The status is saved to the Custom Order Statuses list and registered with WooCommerce.
Step 3: Use the Status
Edit an order and open the Status dropdown. Your custom status appears there alongside the defaults. Select it and the order moves to the new status.
Step 4: Remove a Status
In the Custom Order Statuses list, click the remove button next to a status to delete it. The status is removed from the saved list and no longer registered.

Configuration Details
| Item | What it controls | Default |
|---|---|---|
| Enable Custom Order Status | Master toggle. | Off |
| Status Label | The name shown in the orders list and status dropdown (for example, In Production). |
Blank |
| Status Key | Lowercase, hyphenated identifier registered with WooCommerce (for example, in-production). |
Blank |
- The Status Key must use lowercase letters and hyphens only.
- Each saved status stores a label and is registered as a
wc-<key>status. - The add form lives in the Classic Monks Orders settings; there is no separate page.
What Gets Affected
- The order edit screen: Status dropdown includes your custom statuses
- The orders list: custom statuses are shown and filterable in the Status column
- Order reports and admin lists: registered statuses appear in status counts
- The saved custom-status list: shows every currently configured status
What Does NOT Get Affected
- The default WooCommerce statuses: these stay unchanged
- Existing orders: enabling the feature does not reassign any order
- Customer-facing order displays: custom statuses are registered admin-side; extending them to customer-facing emails or pages requires additional template or hook work
- Other plugins’ status systems: the feature adds statuses into WooCommerce’s own statuses; plugins with separate status systems are unaffected
Advanced Options (Developers)
The feature registers its statuses and hooks in functions/woocommerce/woo-orders.php:
add_filter( 'woocommerce_register_shop_order_post_statuses', 'cm_register_custom_order_status' );
add_filter( 'wc_order_statuses', 'cm_add_custom_order_status_dropdown' );
add_action( 'init', 'cm_register_custom_status_with_wc' );woocommerce_register_shop_order_post_statusescallscm_register_custom_order_status()to add each saved status to WooCommerce’s registered order statuses. Each entry is registered withpublic => true,show_in_admin_all_list => true, andshow_in_admin_status_list => true.wc_order_statusescallscm_add_custom_order_status_dropdown()to add the custom status labels to the status dropdown.initcallscm_register_custom_status_with_wc(), which runsregister_post_status('wc-<key>', ...)for each saved status so it is fully recognized by WordPress and WooCommerce.
All three functions gate on the Enable Custom Order Status toggle and the saved cm_custom_order_statuses option. If either is empty, they return unchanged.

Add your first comment to this post