




What Does the Feature Do?
WooCommerce validates checkout fields when the form is submitted. Enable Inline Checkout Field Validation is designed to bring that validation onto the form in real time, so customers see feedback on their billing and shipping fields while they fill them in, rather than discovering errors only on submit.
Why You Need It
Inline feedback is a standard checkout improvement:
- Customers see what is wrong before they submit, instead of after
- Required and properly formatted fields are clearer to fill
- Fewer failed submissions mean less frustration at the final step
How to Enable Inline Checkout Field Validation
Step 1: Enable the Feature
- In WordPress admin, open Classic Monks > WooCommerce.
- Open the Checkout settings area.
- Toggle on Enable Inline Checkout Field Validation.
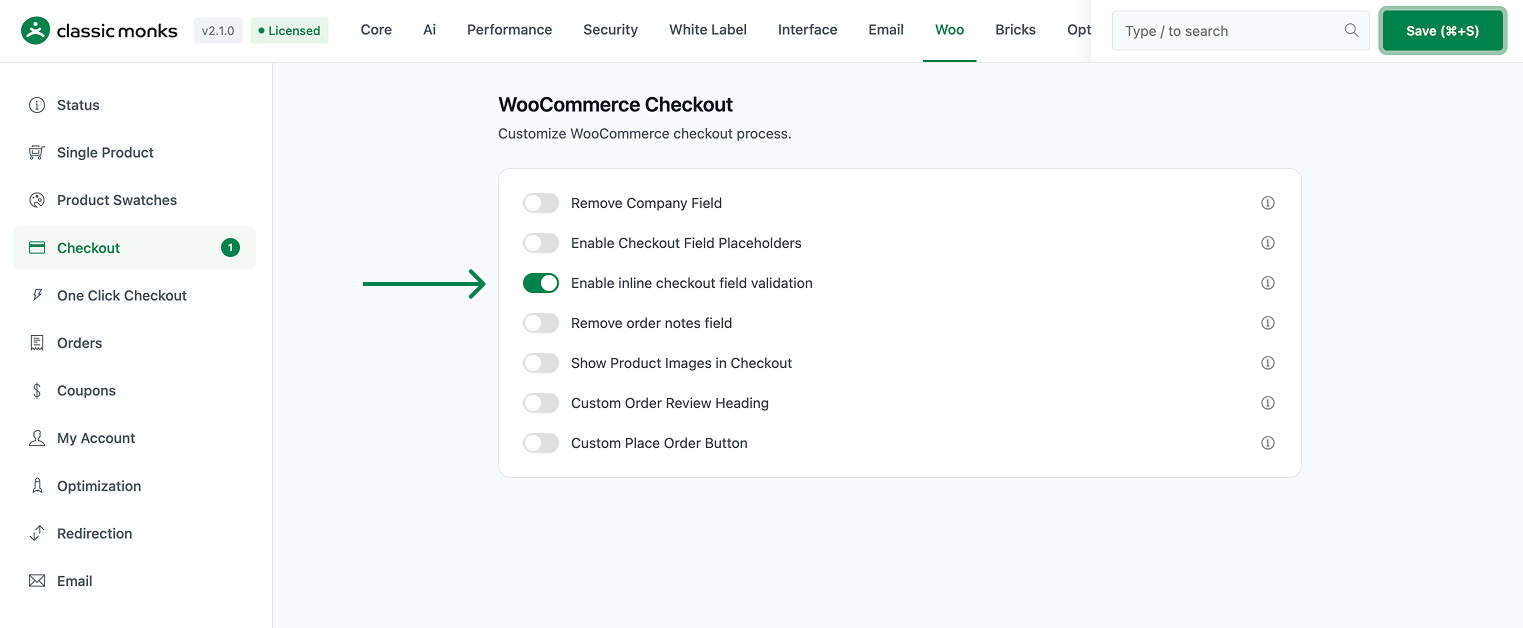
Step 2: Save and Test
Click Save Changes. Visit the checkout page and complete a field to confirm the validation behavior appears inline as configured.
Configuration Options
| Option | Default |
|---|---|
| Enable Inline Checkout Field Validation | Off |
There are no nested options. The toggle controls the feature.
Common Use Cases
Fewer failed checkouts. Immediate feedback helps customers correct a field before they submit the whole form.
Fill errors caught early. Missing billing details are flagged as the customer moves through the form, not at the end.
Cleaner hand-off to WooCommerce. Correctly completed fields pass WooCommerce’s standard checkout validation on submit.
What Gets Affected
- The checkout page: inline validation feedback applies to the checkout fields when the feature is active
- How mistakes are surfaced: intended to show field-level feedback as the customer fills the form
What Does NOT Get Affected
- WooCommerce’s standard field requirements: required and optional rules stay as WooCommerce defines them
- The order review and totals: unaffected by the validation toggle
- Custom checkout fields from other plugins: those are outside this feature’s scope
Advanced Options (Developers)
The option is registered under enable_checkout_fields_validation. Confirm the version you run implements the behavior by inspecting the active build’s frontend checkout handling for a reference to this option. If your installed version does not include it, the validation feedback follows whichever checkout validation scripts your theme and WooCommerce version provide.

Add your first comment to this post