




What Are Bricks Dynamic Data Sources
Bricks Dynamic Data sources in Classic Monks are the data tags that the Bricks Builder uses to display live values. They are organized in the Dynamic Data subtab as independent toggles. Once you enable a source, it appears as a data tag in the Bricks editor’s dynamic data panel, and you can insert it into any text field, attribute, or conditional logic.
Recommendations Before Enabling
- Enable the data sources you use. Each source is independent, so enable the ones your layouts need.
- Test on a live page. After adding a data tag, check the frontend to confirm it shows the expected value.
- Confirm the data is available. Some sources need supporting data, such as WooCommerce or user data, so confirm it exists on the page.
Enable Bricks Dynamic Data
Step 1: Open the Bricks Tab
In your WordPress dashboard, go to Classic Monks, then open the Bricks tab.
Step 2: Open the Dynamic Data Subtab
Click the Dynamic Data subtab.
Step 3: Enable the Data Sources You Need
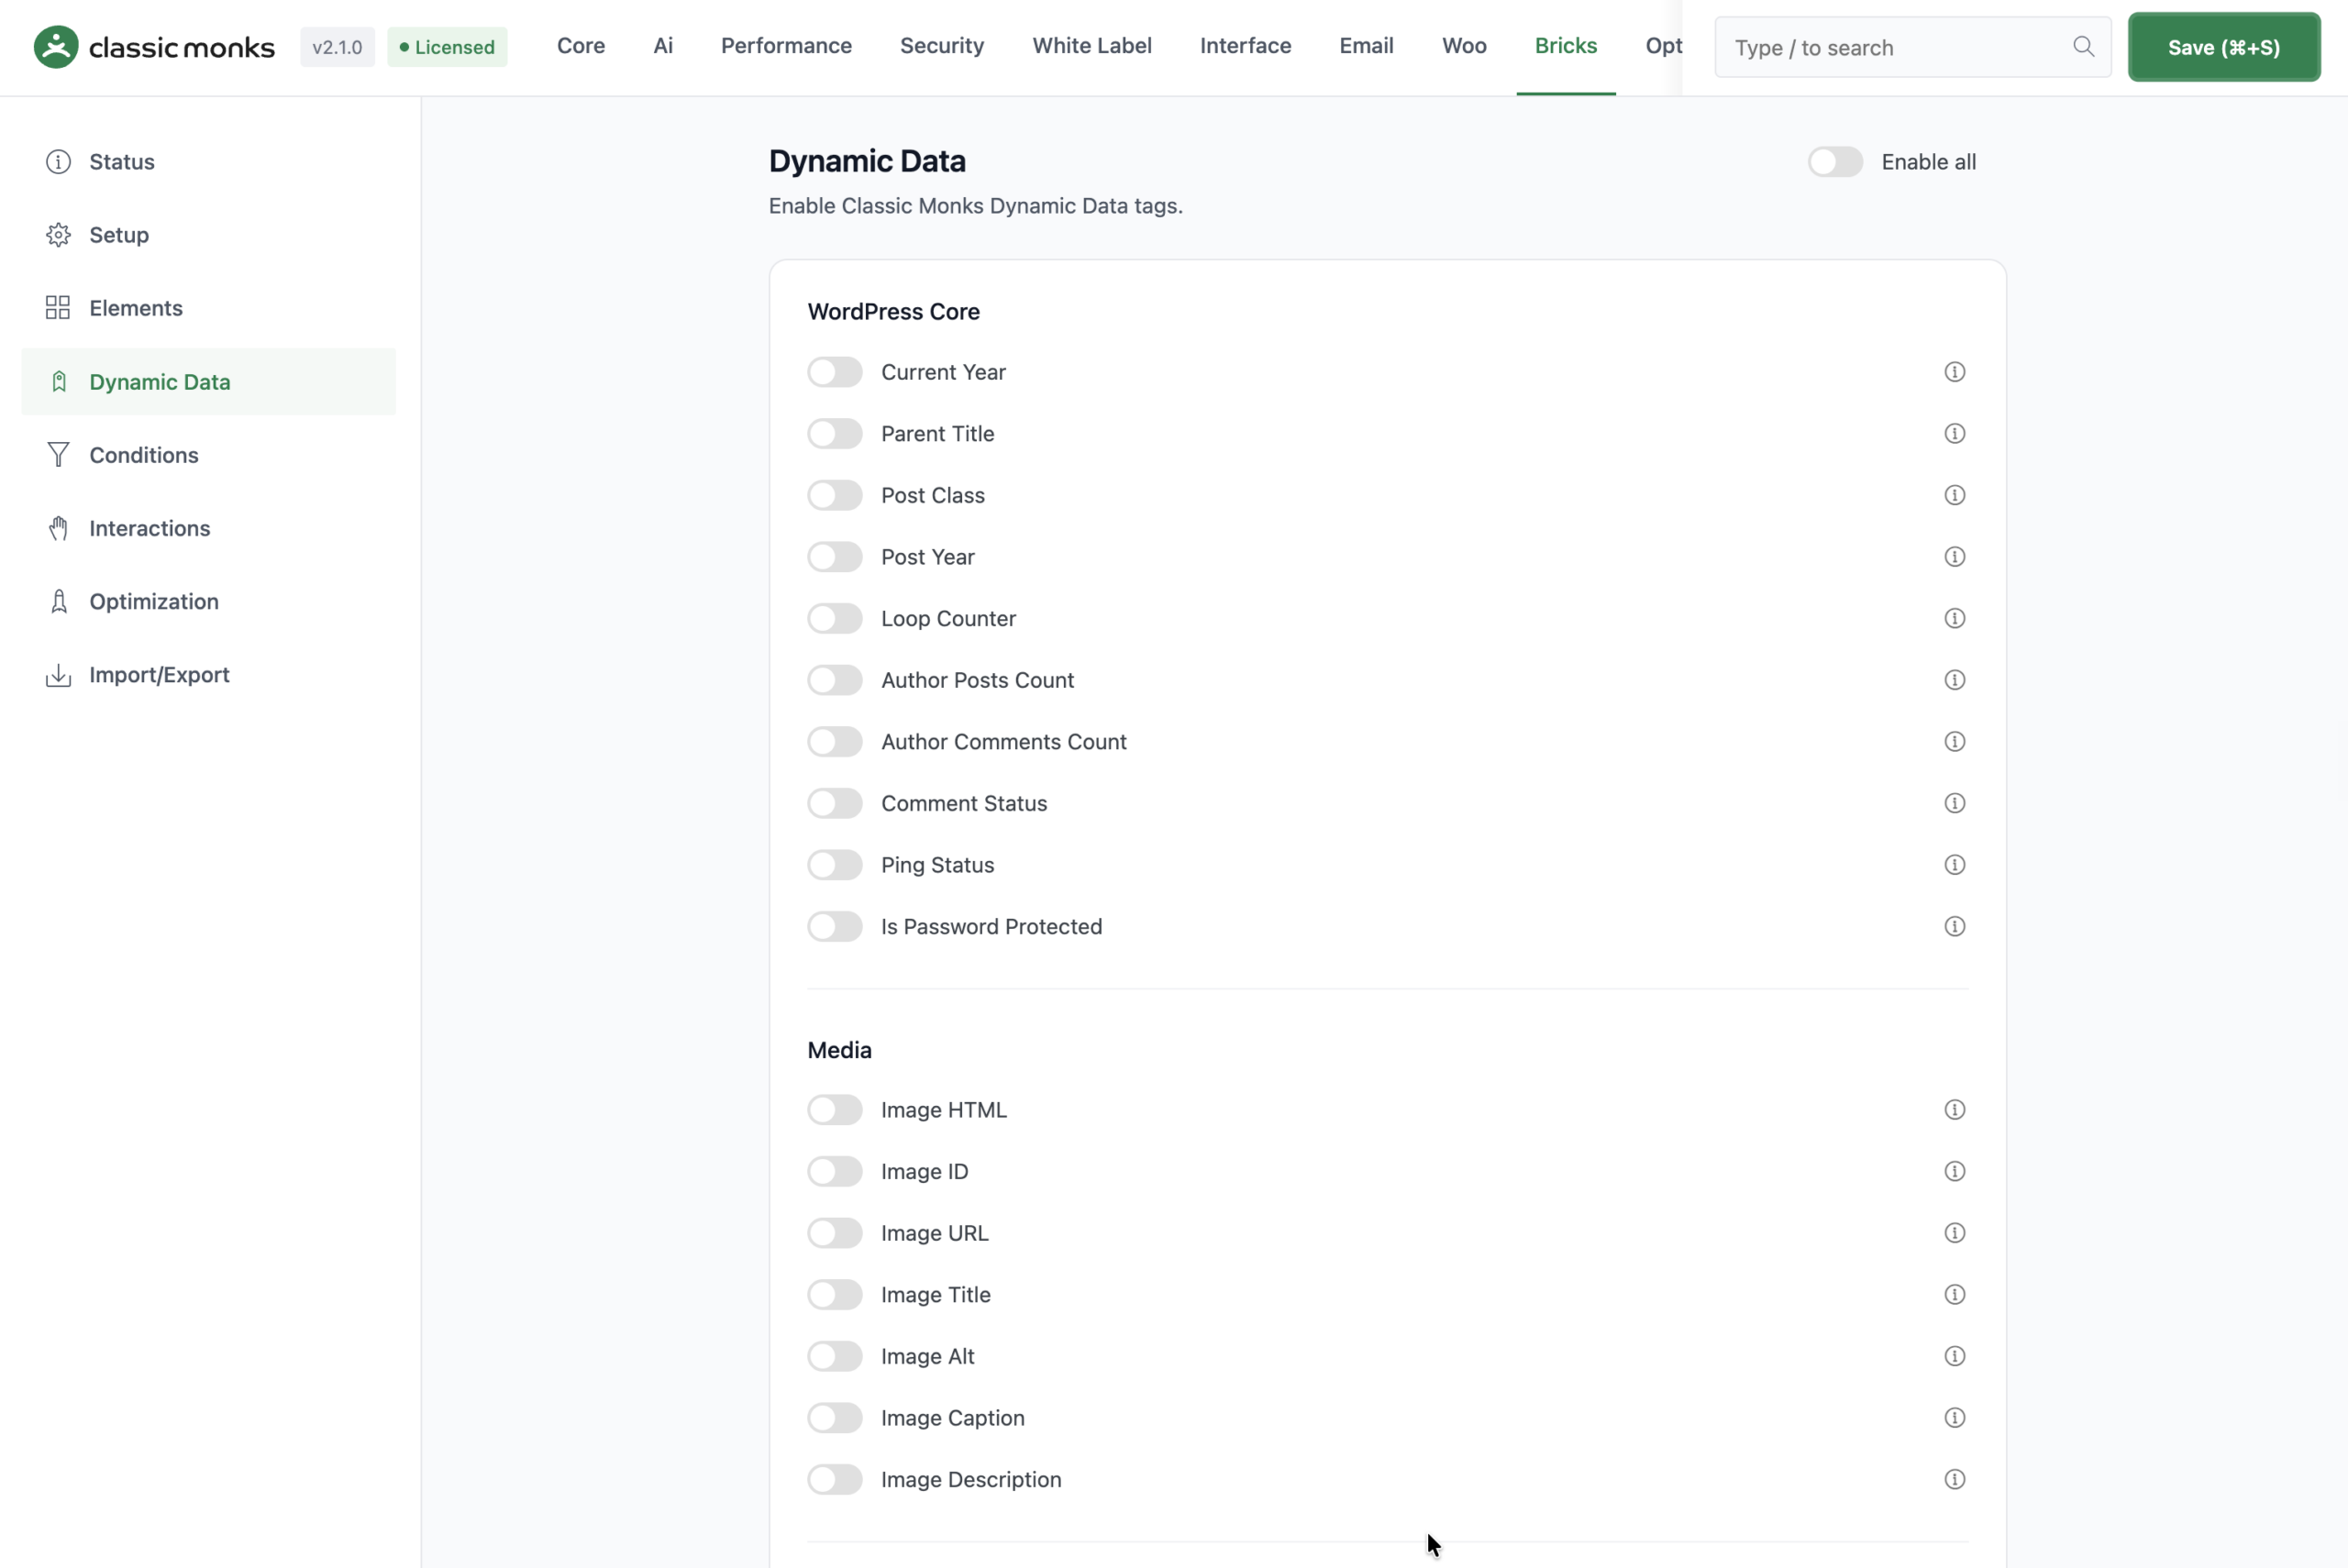
Toggle on the data sources you want. The sources are grouped by type:
- Post and author: current year, parent title, post class, post year, loop counter, author stats, comment and ping status, password protection, published and updated time, post views, word count, reading time, and more.
- Image and media: image HTML, ID, URL, title, alt, caption, and description.
- Content analysis: headings, paragraphs, lists, tables, external links, shortcodes, blocks, and media counts.
- Taxonomy: taxonomy depth, children count, parent, hierarchy, and visibility.
- WooCommerce: product type, stock, cart data, shipping class, sale dates, total sales, reviews, ratings, customer stats, product details, tax and download, and order data.
Step 4: Save
Click Save (⌘+S).
Step 5: Use a Data Source in the Editor
Open a page in the Bricks editor, select a text field or attribute, and insert a data tag from the dynamic data panel.
Verify It Works
After enabling a data source, verify it:
- Open the Bricks editor and insert the data tag into a field.
- View the page on the frontend and confirm it shows the expected value.
- Confirm the data tag appears in the dynamic data panel.
If a data source does not appear, confirm its toggle is on and the editor was refreshed.
Common Use Cases
Show the current year in a footer
Enable the Current Year data source and insert it into a footer text field. The footer always shows the current year without updating it manually.
Show a reading time badge
Enable the Reading Time data source and add it to a post template. Each post shows its estimated reading time.
Show a product’s average rating
Enable the Average Rating data source and add it to a product template. The template shows the product’s average star rating.
Show a sale start date
Enable the Sale Start Date data source and add it to a product template. The template shows when the product’s sale begins.

Add your first comment to this post