




What Are the Bricks UI Improvements
The Bricks UI Improvements are a group of options in the Classic Monks Bricks tab, Initial Setup subtab, that change the look of the Bricks Builder editor. They do not change the Bricks data or the frontend; they only improve how the editor looks and how easy it is to read while you build. They are independent toggles, so you can turn on only the improvements you want.
Recommendations Before Enabling
- Enable improvements one at a time. Each toggle is independent, so turn them on and check the editor after each change.
- Open the Bricks editor to test. The improvements appear only in the Bricks Builder editor, so test with the editor open.
- Use the ones that help your workflow. Not all improvements suit every user, so pick the ones that make the editor clearer for you.
Improve the Bricks Editor
Step 1: Open the Bricks Tab
In your WordPress dashboard, go to Classic Monks, then open the Bricks tab.
Step 2: Open the Initial Setup Subtab
Click the Initial Setup subtab.
Step 3: Improve Active Element Highlighting
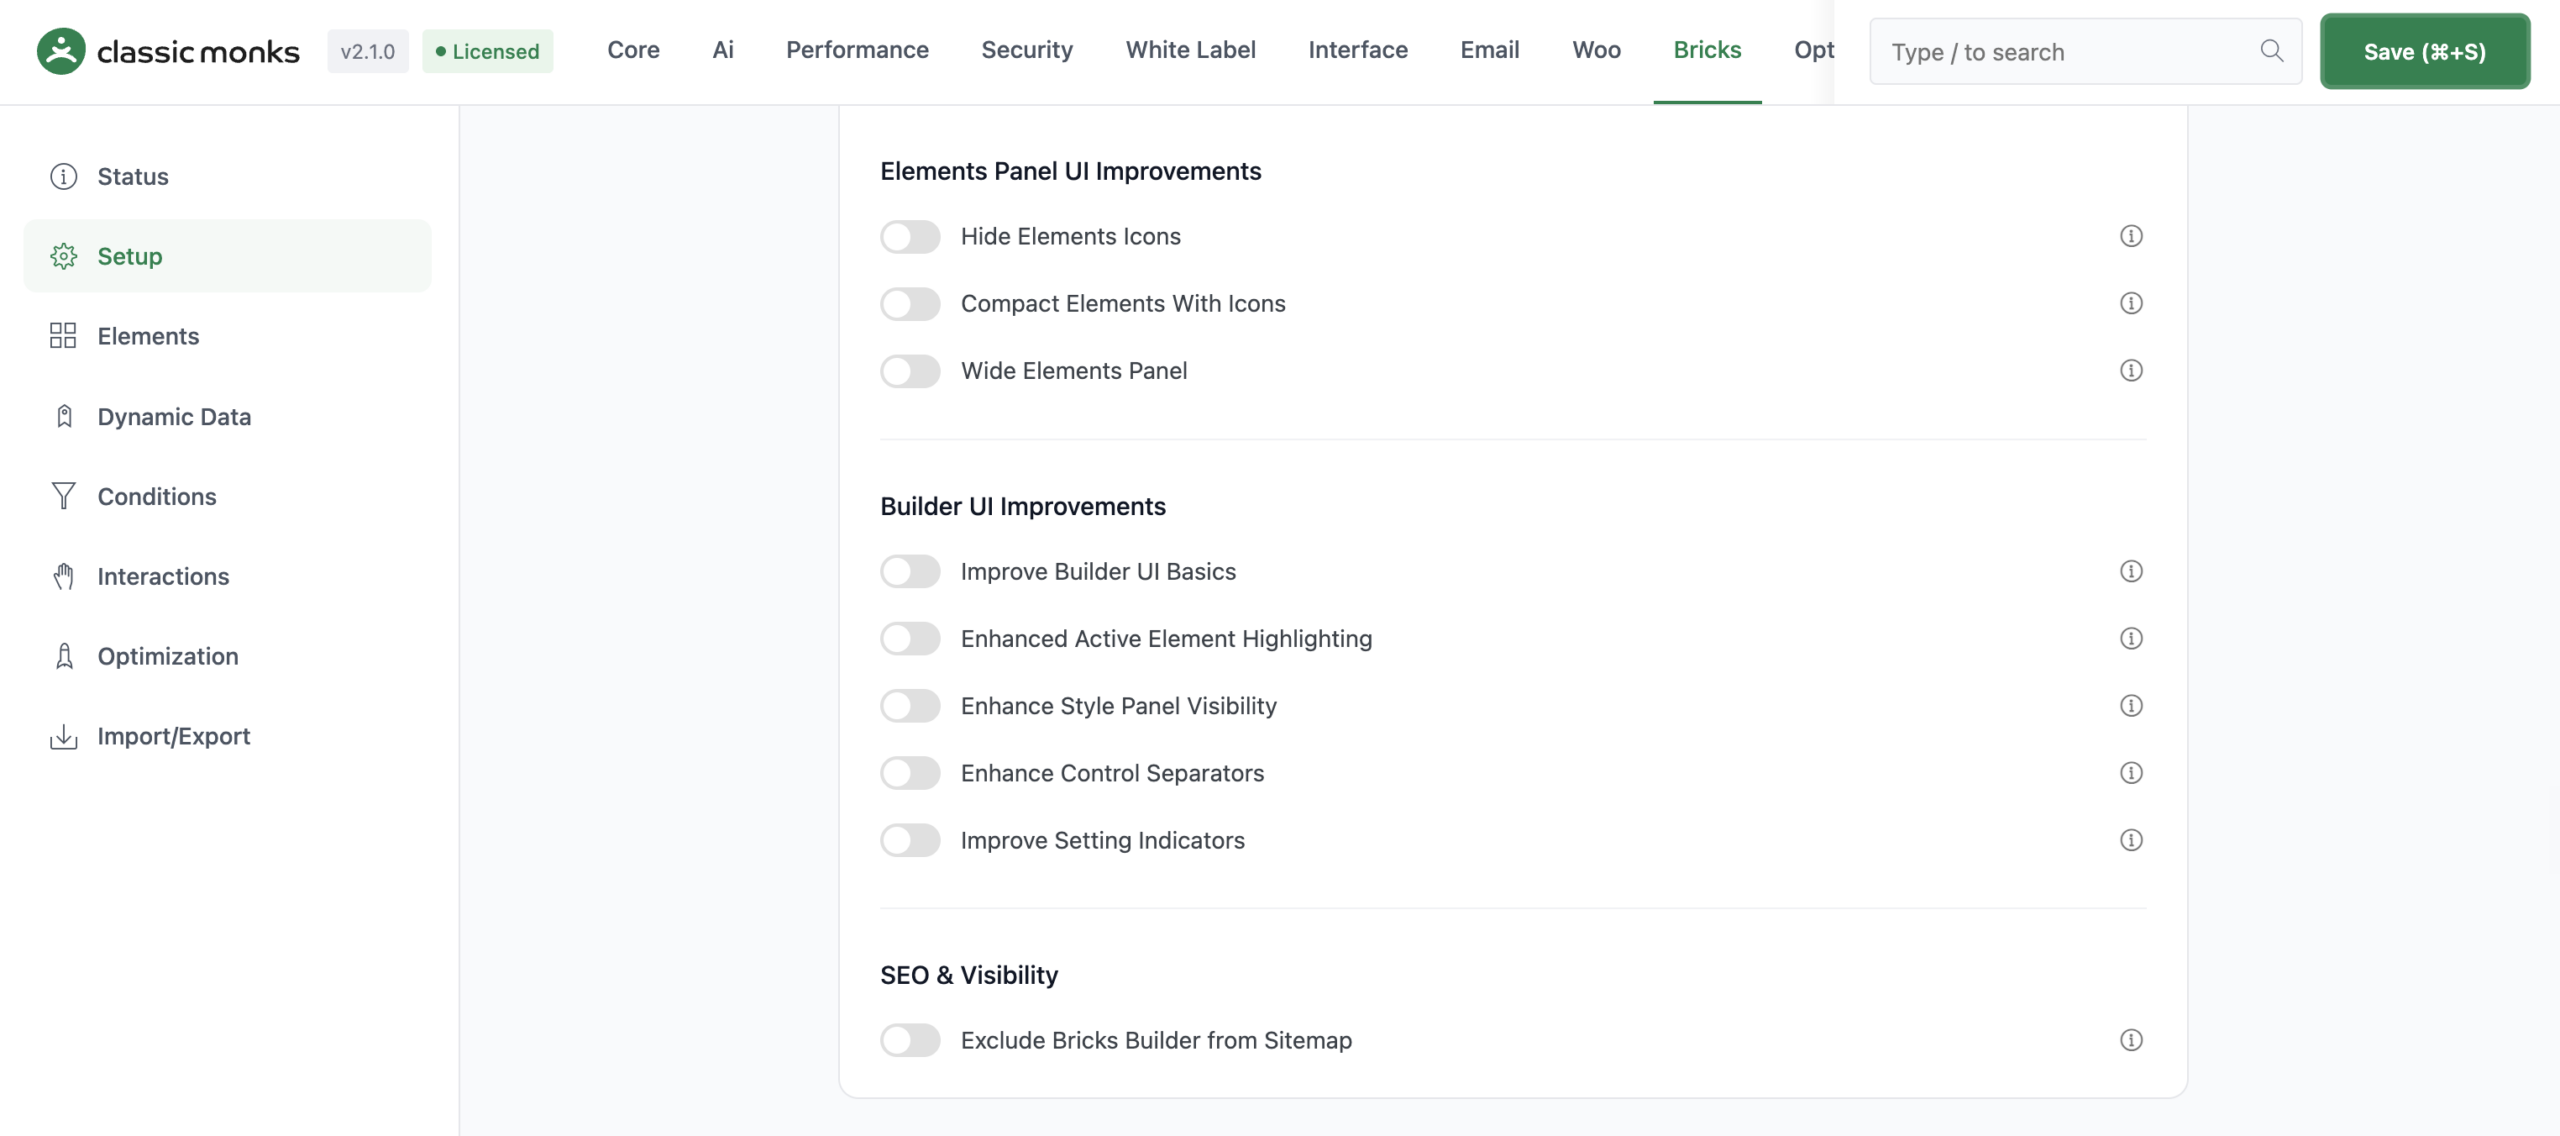
Toggle on Enhanced Active Element Highlighting. The currently selected element in the structure panel gets a more prominent highlight, so you can see which element is active.
Step 4: Improve the Style Panel
Toggle on Enhance Style Panel Visibility. The style panel control groups become more visible, making it easier to find the section you are editing.
Step 5: Improve Control Separators
Toggle on Enhance Control Separators. The separators between control groups in the style panel become clearer, so the panel is easier to scan.
Step 6: Improve Setting Indicators
Toggle on Improve Setting Indicators. Controls that have a value set show a clearer indicator, so you can tell at a glance which settings are active.
Step 7: Adjust the Elements Panel
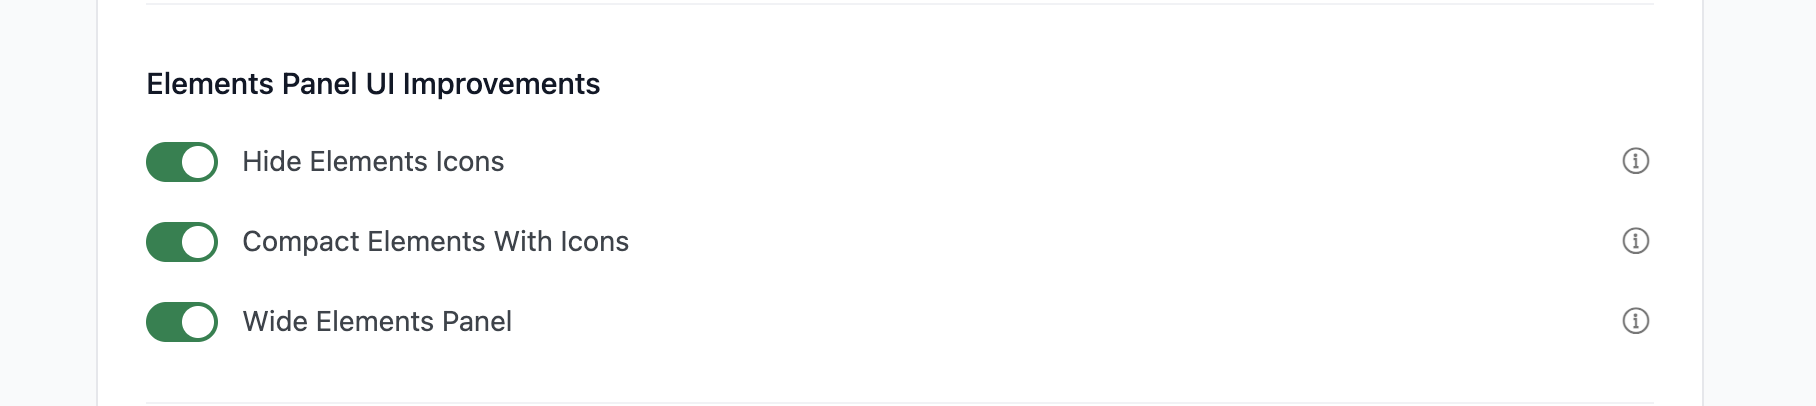
If you want a cleaner elements panel, toggle on Hide Elements Icons, Compact Elements With Icons, or Wide Elements Panel to change how the element list looks.
Step 8: Move the Toolbar to the Bottom
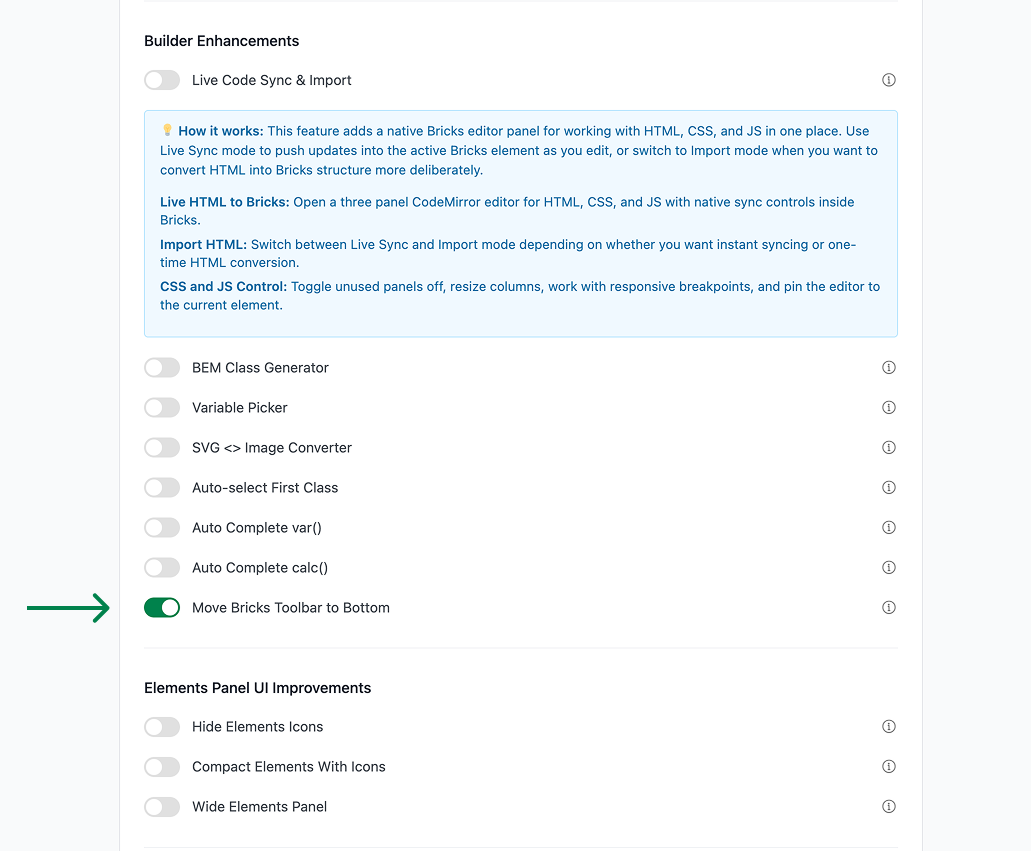
Toggle on Move Bricks Toolbar to Bottom to move the Bricks toolbar to the bottom of the editor for a different layout.
Step 9: Save and Test
Click Save (⌘+S). Open the Bricks editor and confirm the improvements appear.
Verify It Works
After saving, open the Bricks editor and confirm:
- The active element has a clear highlight in the structure panel.
- The style panel and control separators are more visible.
- Controls with set values show a clear indicator.
- The elements panel and toolbar match your chosen layout.
If an improvement does not appear, confirm its toggle is on and the editor was refreshed.
Examples
Example 1: Build Complex Layouts With Clearer Highlighting
A developer builds complex layouts with many nested elements. Toggle on Enhanced Active Element Highlighting and Enhance Style Panel Visibility. The active element and its style panel are easier to see, so the developer can navigate the structure quickly.
Example 2: A Calmer Elements Panel
A designer finds the element icons distracting. Toggle on Hide Elements Icons to remove the icons and show a cleaner element list, or Compact Elements With Icons to keep the icons but make the elements more compact.
Example 3: A Bottom Toolbar for a Different Workflow
A user prefers the toolbar at the bottom. Toggle on Move Bricks Toolbar to Bottom. The toolbar moves to the bottom of the editor, which suits a different working style.

Add your first comment to this post