




What Are Bricks Elements
Bricks Elements in Classic Monks are custom components that extend the Bricks Builder. They are organized in the Elements subtab as independent toggles. Once you enable an element, it appears in the Bricks editor’s element panel, where you can drag it into the canvas and configure it. The elements cover animations, content displays, WooCommerce, gallery and query, and utility controls.
Recommendations Before Enabling
- Enable only the elements you use. Each element is independent, so enable the ones your layouts need to keep the editor clean.
- Test on a live page. After adding an element, check the frontend to confirm it renders correctly.
- Start with a few. Enable a small set first, verify they work, then add more.
Enable Bricks Elements
Step 1: Open the Bricks Tab
In your WordPress dashboard, go to Classic Monks, then open the Bricks tab.
Step 2: Open the Elements Subtab
Click the Elements subtab.
Step 3: Enable the Elements You Need
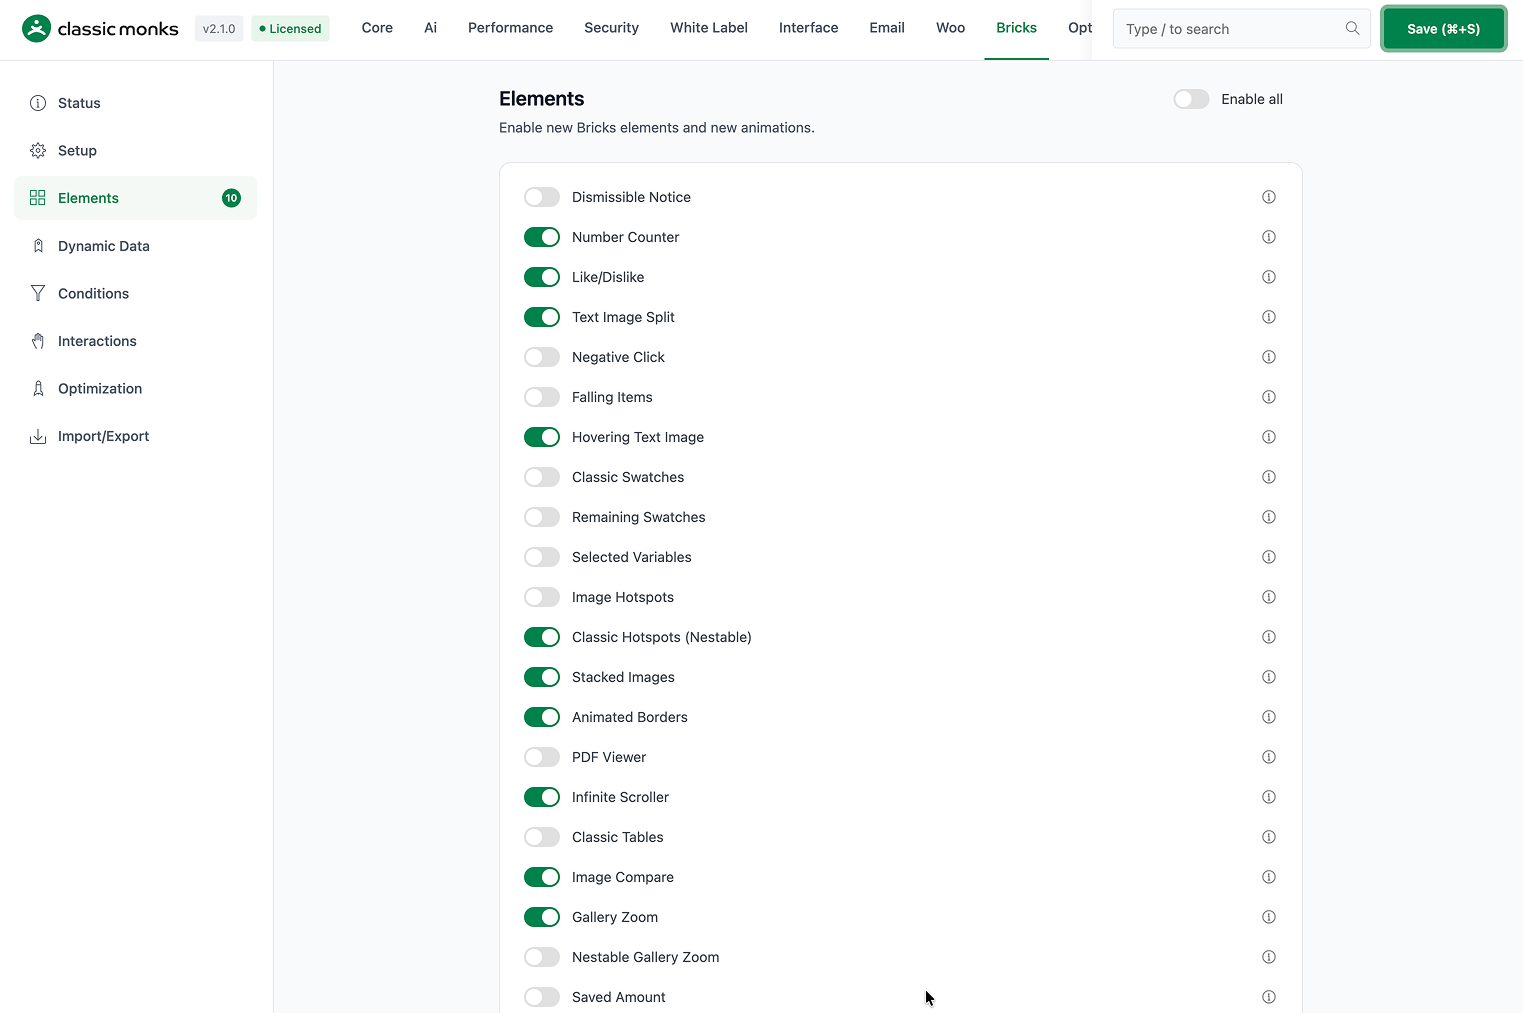
Toggle on the elements you want. The elements are grouped by type:
- Animation and visual effects: dismissible notice, number counter, like/dislike, animated text, animated borders, block tilt, falling items, and more.
- Content and media: classic tables, image compare, gallery zoom, PDF viewer, infinite scroller, Lottie animation, OpenStreetMap, reviews box, flipbox, timeline, classic slideshow, and more.
- WooCommerce: saved amount, percentage off, buy now, mini cart quantity controls, wishlist icon, wishlist query, and wishlist count.
- Gallery and query: product gallery query, gallery image data, menu query, recently viewed, comments query, and WooCommerce reviews.
- Utility and controls: click to copy, web share API, element tooltips, read more buttons, tabs and slider controls, Monks cursor, lazy loading, preloading, animate on scroll, parallax, and text animation.
Step 4: Save
Click Save (⌘+S).
Step 5: Use an Element in the Editor
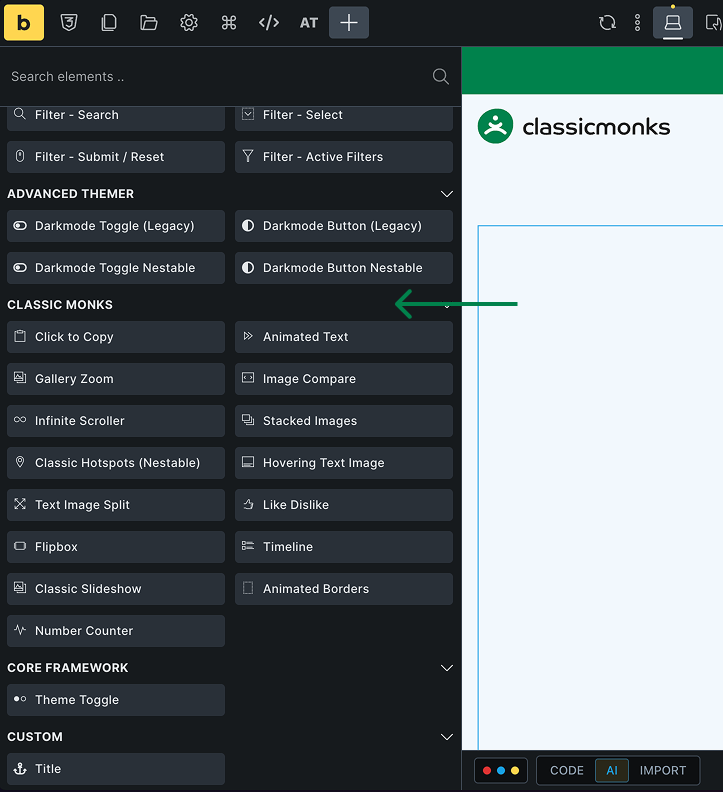
Open a page in the Bricks editor. The enabled elements appear in the element panel. Drag one into the canvas and configure its settings.
Verify It Works
After enabling an element, verify it:
- Open the Bricks editor and confirm the element appears in the element panel.
- Drag the element into the canvas.
- View the page on the frontend and confirm the element renders correctly.
If an element does not appear, confirm its toggle is on and the editor was refreshed.
Common Use Cases
Add a number counter to a stats section
Enable the Number Counter element and add it to a stats section. It animates the count when the visitor scrolls to it, which works well for milestones and metrics.
Add a before and after image compare
Enable the Image Compare element and add it to a product or portfolio page. Visitors can drag a slider to compare two images.
Add a buy now button to a product
Enable the WooCommerce Buy Now element and add it to a product page. Visitors can skip the cart and go straight to checkout.
Add a tooltip to a UI element
Enable the Element Tooltips element and add a tooltip to a UI element. Visitors see helpful text when they hover over it.

Add your first comment to this post