




What Does Product Price History Do?
WooCommerce shows a sale price when a product is on sale, but it does not tell shoppers what the price was before. Product Price History closes that gap: whenever a product or variation is saved with a changed price, Classic Monks records the new price in a dedicated cm_price_history table. On the frontend, it looks up the lowest recorded price inside your configured window and, for sale products, renders that lowest price according to the display type and location you choose.
The feature is built for the EU Omnibus Directive, which requires merchants to show the lowest price a product was presented at during the 30 days before a price reduction. Its Calculation Mode supports both a rolling window and a sale-start window to match that requirement.
When to Enable It
Enable Product Price History when you run regular sales and want the lowest recent price shown automatically, when you sell into EU markets and must disclose the lowest price from the 30 days before a reduction, or when you want an admin view of price changes on the product edit screen. Keep it off if the store never runs sales and has no price-disclosure requirement.
The feature requires WooCommerce to be active. If WooCommerce is not running, the loader bails out immediately and nothing is tracked or shown.
How to Configure WooCommerce Price History
Step 1: Enable Product Price History
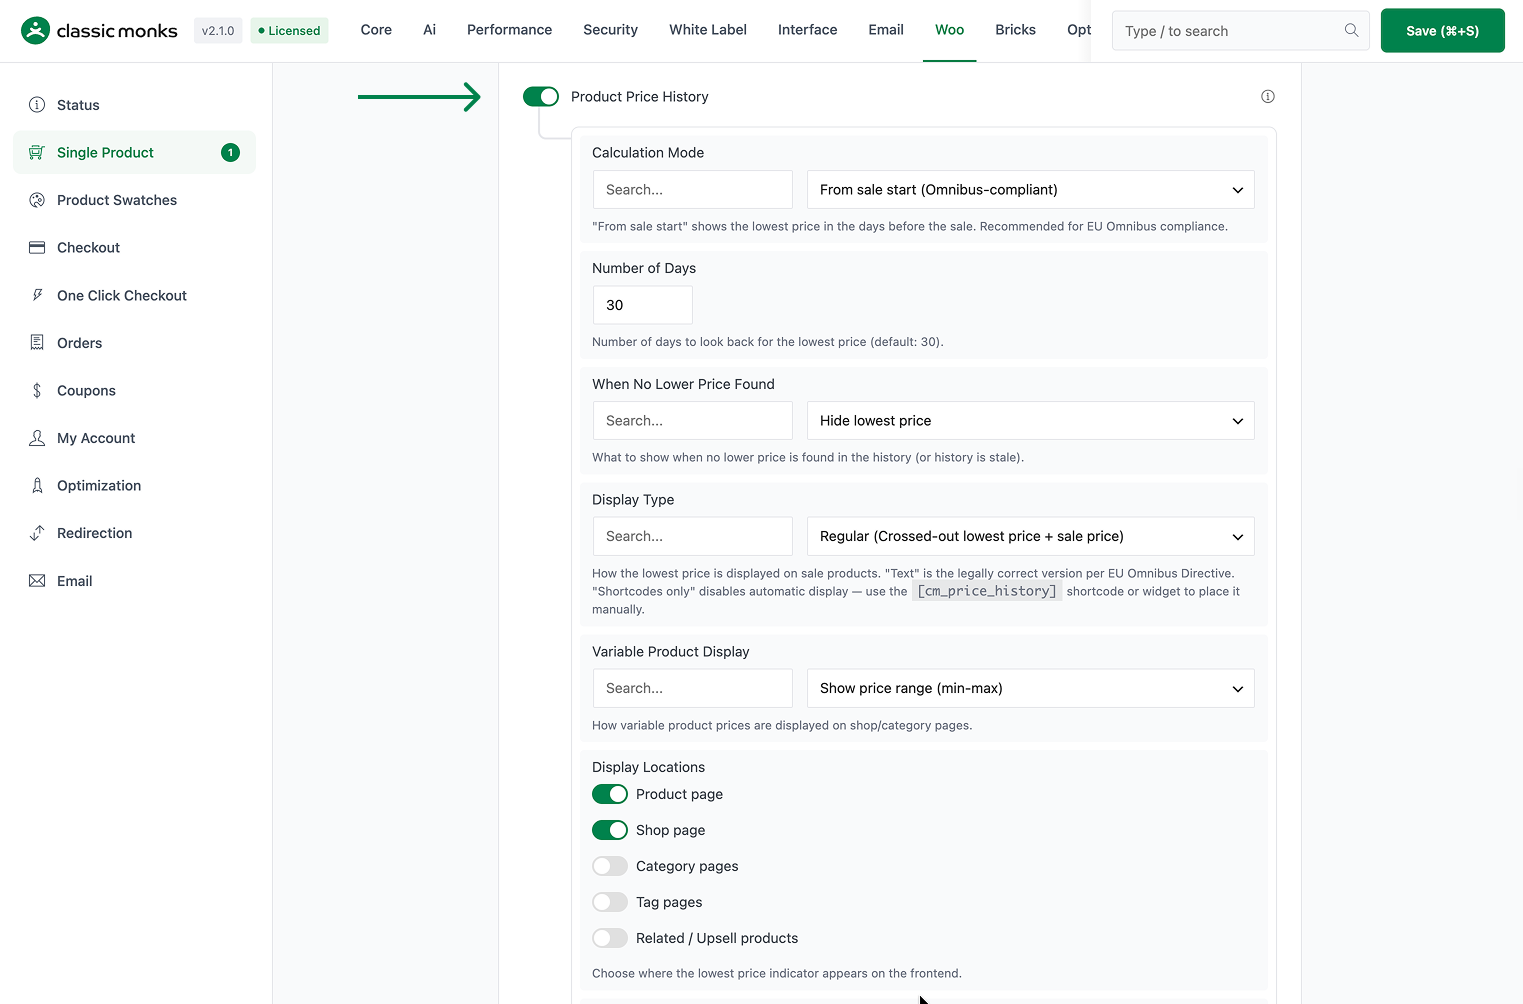
In WordPress admin, open Classic Monks > WooCommerce, open the Single Product settings area, and toggle on Product Price History. The nested options expand below the toggle.
Step 2: Choose the Calculation Mode
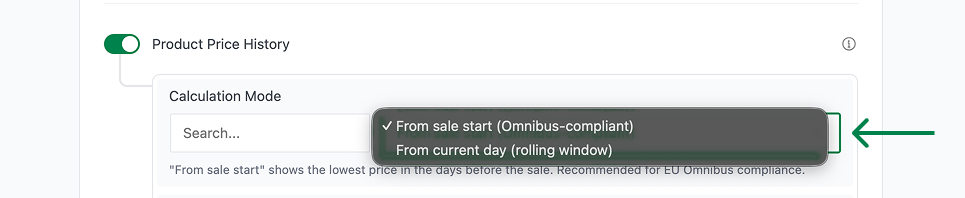
Use Calculation Mode to set where the lookback window starts:
- From sale start (Omnibus-compliant): looks back from the product’s sale start date. Choose this when EU Omnibus compliance is the goal.
- From current day (rolling window): uses a rolling window from today.
Step 3: Set the Lookback Window
Use Number of Days to define how far back the lowest-price search goes. The default is 30, with a supported range of 1 to 365.

Step 4: Decide the Fallback
Use When No Lower Price Found to control what happens when the history is empty or not lower than the current price: Hide lowest price, Show current price as lowest, or Show custom text. For custom text, set the wording in Custom Fallback Text and use the {days} placeholder for the lookback period.

Step 5: Choose the Display Type
Use Display Type to control how the lowest price renders:
- Regular (Crossed-out lowest price + sale price): the classic sale treatment.
- Text (Separate lines with labels): clearly labels the current and lowest prices. The legally conservative option for EU Omnibus.
- Alternative (Below product meta): renders below the product meta block.
- Shortcodes only (Manual placement): disables automatic rendering; you place the lowest price manually with the shortcode.

Step 6: Set Variable Product Display
Use Variable Product Display to control variable product prices in shop and category loops: Show price range (min-max) or Show minimum price only.

Step 7: Choose Display Locations
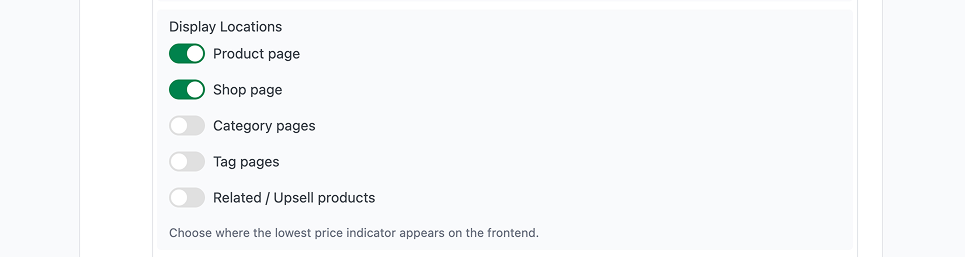
Use Display Locations to pick where the indicator appears: Product page, Shop page, Category pages, Tag pages, and Related / Upsell products. Enable only the locations you need. When Display Type is Shortcodes only, these are ignored and the lowest price appears only where you place the shortcode.
Step 8: Set Custom Labels
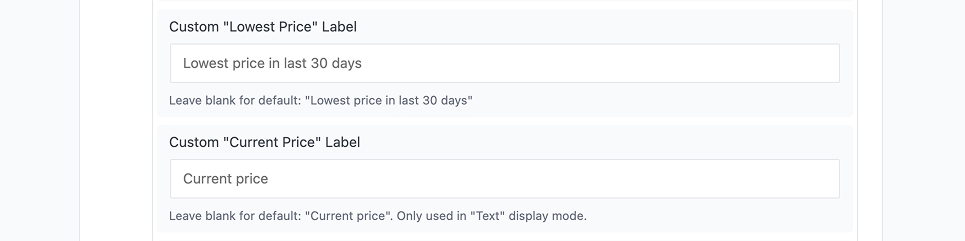
Use Custom “Lowest Price” Label and Custom “Current Price” Label to override the default wording. The current-price label only appears in Text mode. Leave both blank to use the defaults.
Step 9: Save and Verify
Click Save Changes. Visit a sale product and confirm the lowest price appears where you selected, with the label and formatting matching your Display Type.
Configuration Options
| Option | What it controls | Source default |
|---|---|---|
| Product Price History | Master toggle for the feature. | Off |
| Calculation Mode | Whether the lookback starts from the sale start date or uses a rolling window from today. | From sale start |
| Number of Days | Lookback window in days (1-365). | 30 |
| When No Lower Price Found | Fallback behavior when the history is empty or not lower than the current price. | Hide lowest price |
| Custom Fallback Text | Fallback wording when the custom-text fallback is selected. Supports the {days} placeholder. |
Price in the last {days} days is the same as current price |
| Display Type | Regular, Text, Alternative, or Shortcodes only. | Regular |
| Variable Product Display | Price range (min-max) or minimum price in loops. | Range |
| Display Locations | Product, shop, category, tag, and related/upsell. Ignored in shortcode-only mode. | Product page and shop page |
| Custom “Lowest Price” Label | Override the default lowest-price label. | Blank (uses default) |
| Custom “Current Price” Label | Override the default current-price label in text mode. | Blank (uses default) |
How Product Price History Works
Price tracking. Whenever a product or variation is saved with a changed price, Classic Monks records a new row. A fractional-precision check skips unchanged prices so no spurious rows are created. Variable products are tracked at the variation level, so each variant’s price changes are recorded and the parent display stays meaningful.
Lowest-price lookup. When WooCommerce renders price HTML, the feature reads the cached lowest price for the product (or variation) within the window. If it is lower than the current regular price it renders the lowest price per your display and location settings; otherwise it uses your fallback.
Omnibus mode. In From sale start mode the window is anchored to the product’s sale start date, which is the setup that satisfies the EU Omnibus requirement to disclose the lowest price from the 30 days before a reduction.
Product Edit Screen Price History
When the feature is active, the product edit screen includes a Price history (N days) meta box. For a variable product it also lists the variations’ history entries. Use it to view recorded rows (sale price, regular price, since, until), edit an entry’s values, apply an earlier price as the current product price, or delete an incorrect entry. Normal price tracking is automatic; the meta box is for corrections, audits, and manually reverting a price.
Shortcode and Widget
Use the [cm_price_history] shortcode to display the lowest price for a product or variation anywhere on the site, including page-builder content, promotional copy, or custom templates.
Examples:
[cm_price_history]                                             Current product, with currency symbol
[cm_price_history id="3"]                                      Specific product by ID
[cm_price_history id="3" variation_id="15"]                    Specific variation
[cm_price_history id="3" show_currency="0"] Without currency symbolid(default 0): product ID. When omitted, the current product in the loop is resolved automatically.variation_id(default 0): a specific variation of a variable product.show_currency(default 1): set 0 to return the raw number without the currency symbol.
The feature also registers a Price History widget (CM_Price_History_Widget) through widgets_init, so a lowest-price line can be placed in any widget area.
Verify the Result
- Product page: open a sale product and confirm the indicator appears, matching Display Type.
- Shop loop: open the shop page and confirm the indicator (and Variable Product Display behavior for variable products).
- Omnibus: use a product whose sale price is lower than the regular price but not the history low, and confirm the displayed lowest price reflects history, not just the sale badge.
- Meta box: open the product edit screen, confirm the Price history (N days) box is present, and save a new price to see a new row.
Developer Notes
Source and assets
functions/woocommerce/price-history.php- Admin:
assets/css/cm-price-history.css,assets/js/cm-price-history-admin.js - Frontend:
assets/js/cm-price-history.js,assets/js/cm-price-history.min.js
Database
- Custom table
{wpdb_prefix}cm_price_historyis created viadbDeltaon demand, storingprice_history_id,product_id,regular_price,sale_price,timestamp,timestamp_end. An open row (timestamp_end = 0) marks the currently active price. - Cached lowest price is kept in post meta
_cm_price_history(no autoload). - Writes are wrapped in a transaction with row-id WHERE clauses so concurrent saves cannot duplicate the active row.
Important hooks
- Tracking:
woocommerce_update_product,woocommerce_update_product_variation,woocommerce_before_product_object_save,woocommerce_before_variation_object_save - Frontend:
woocommerce_get_price_html(filter, priority 1000),woocommerce_product_meta_end(alt mode),wp_enqueue_scripts(alt mode, product page) - Admin:
add_meta_boxes_product,admin_enqueue_scripts(product screen),widgets_init - AJAX:
wp_ajax_cm_price_history_delete/apply/update - Shortcode:
cm_price_history
Notes:
cm_price_history_init()gates on WooCommerce being active and the Product Price History toggle; otherwise it returns immediately.- Variable parents are skipped in tracking (per-variation rows are recorded instead), and a request-scoped guard prevents double tracking on a single save.
- Display Type selects the frontend hooks:
regular/textusewoocommerce_get_price_html;altuseswoocommerce_product_meta_endplus the frontend script;shortcoderegisters no automatic render.
The internal feature reference at docs/features-docs/price-history/price-history.md has the full schema and write-path details and is the resource for developer support work, not the public-facing article.

Add your first comment to this post